
Imagine sinking into a chair so big and comfortable that it feels like it was made just for you. A large Adirondack chair does exactly that—it invites you to relax, unwind, and enjoy your outdoor space like never before.
If you’ve ever thought about building one yourself, you’re in the right place. This guide will walk you through simple steps to create a sturdy, stylish Adirondack chair that stands out and gives you hours of comfort. Ready to turn your backyard into a cozy retreat?
Let’s get started!
Credit: www.etsy.com
Choosing Materials
Building a large Adirondack chair needs the right materials. Good materials make the chair strong and last long.
Choosing the right wood and tools is the first step. It helps you build safely and well.
Selecting Wood Types
Pick wood that is strong and can handle weather. Cedar and pine are popular choices.
Look for wood that is smooth and free of cracks. This wood is easier to work with and lasts longer.
- Cedar: Lightweight, weather-resistant, and easy to paint
- Pine: Affordable and easy to find but needs sealing
- Redwood: Durable and good for outdoor use
- Pressure-treated wood: Resistant to rot but may need special tools
Gathering Tools And Supplies
Have all your tools ready before you start. This saves time and helps you work safely.
Basic tools include saws, drills, and sandpaper. You also need screws and wood glue.
- Measuring tape for accurate cuts
- Hand or power saw to cut wood pieces
- Drill with bits for making holes
- Screwdriver or impact driver for screws
- Sandpaper or electric sander for smooth edges
- Wood glue for extra strength
- Clamps to hold pieces while gluing
Credit: www.etsy.com
Cutting And Preparing Pieces
Building a large Adirondack chair requires careful preparation. This begins with cutting and preparing the wood pieces accurately.
Understanding the steps involved in measuring and cutting ensures a well-built chair. Let’s explore these steps in detail.
Measuring Dimensions
Measuring dimensions correctly is crucial. It ensures all pieces fit perfectly together.
Use a tape measure and a carpenter’s square for accuracy. Double-check all measurements before cutting.
- Measure twice to avoid errors.
- Mark clearly with a pencil.
- Account for the thickness of the saw blade.
Cutting Wood Accurately
Cutting wood accurately ensures a stable chair. Use the right tools for precise cuts.
A circular saw or a miter saw works well. Follow safety guidelines when operating these tools.
- Wear safety goggles and gloves.
- Secure wood with clamps before cutting.
- Cut slowly to maintain control.
Assembling The Chair
Putting together a large Adirondack chair takes care and patience. You will join all the parts to form a strong and comfortable chair. Follow the steps carefully for the best results.
This guide covers building the frame and attaching the seat and backrest. Each part is important for a sturdy chair.
Building The Frame
Start by assembling the base and arms of the chair. Use wood screws to join the legs and support beams tightly. Make sure everything is square and level before tightening the screws all the way.
- Lay out all frame pieces on a flat surface.
- Attach the front and rear legs to the seat frame.
- Secure the armrests to the legs and seat frame.
- Add support braces between the legs for stability.
- Check all joints to ensure they are flush and strong.
Attaching The Seat And Backrest
After the frame is complete, attach the seat slats and backrest boards. Align each board evenly and screw them into the frame. Use a spacer to keep gaps uniform between boards.
| Part | Number of Boards | Fasteners Needed |
| Seat Slats | 5 | 2 screws per board |
| Backrest Boards | 4 | 3 screws per board |
Finishing Touches
Finishing your large Adirondack chair makes it look great and last longer. This step protects the wood from weather and wear.
Good finishing also makes the chair safe and smooth to use. Pay attention to sanding and applying paint or sealant.
Sanding And Smoothing
Sanding removes rough spots and splinters on the wood. Use sandpaper with medium grit first, then fine grit for a smooth finish.
Sand all surfaces, edges, and corners. Wipe off dust with a clean cloth before moving to the next step.
- Start with 80-120 grit sandpaper
- Finish with 180-220 grit sandpaper
- Sand along the wood grain for best results
- Clean dust using a damp cloth or tack cloth
Applying Paint Or Sealant
Paint or sealant protects the chair from water, sun, and dirt. Choose outdoor paint or a clear sealant made for wood furniture.
Apply paint or sealant in thin, even coats. Let each coat dry fully before adding another. Use a brush or spray for best coverage.
- Use exterior-grade paint or sealant
- Apply 2-3 coats for strong protection
- Dry each coat as the product instructions say
- Consider adding a primer before painting

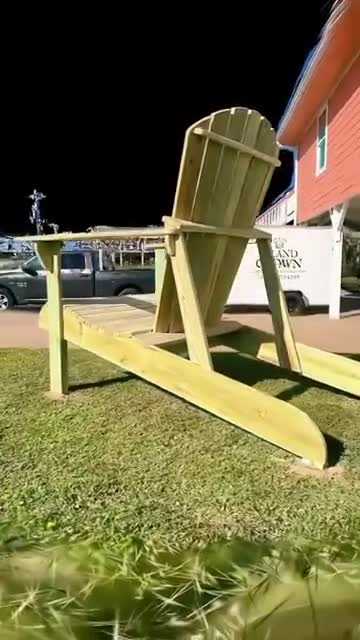
Credit: www.youtube.com
Frequently Asked Questions
What Materials Are Best For Building A Large Adirondack Chair?
Use durable wood like cedar, redwood, or treated pine. These woods resist weather and last longer outdoors. Choose weather-resistant screws and exterior wood glue for strong joints. Quality materials ensure your chair stays sturdy and beautiful over time.
How Long Does It Take To Build A Large Adirondack Chair?
Building a large Adirondack chair typically takes 4 to 6 hours. This depends on skill level and available tools. Allow extra time for sanding and finishing. Taking your time ensures better craftsmanship and a comfortable, sturdy chair.
Can I Customize The Size Of My Adirondack Chair?
Yes, you can easily adjust dimensions when planning your chair. Modify seat height, width, and backrest angle to fit your needs. Use a scalable plan or template to maintain proper proportions. Customizing ensures comfort and suits your outdoor space perfectly.
What Tools Are Needed For Building An Adirondack Chair?
Essential tools include a saw, drill, screwdriver, measuring tape, and clamps. Sandpaper or a power sander smooths edges. A square helps keep joints precise. Having the right tools makes construction easier and improves the chair’s quality.
Conclusion
Building a large Adirondack chair can be a fun and rewarding project. You only need simple tools and some patience. Follow the steps carefully, and take your time with each part. Enjoy the process of creating something useful and beautiful.
Soon, you will have a sturdy chair to relax in. This project brings both joy and pride. Give it a try and see how satisfying woodworking can be!


