
Are you tired of stepping over shoes scattered all around your entryway? Imagine having a stylish shoe rack bench that not only keeps your shoes organized but also gives you a comfortable spot to sit while putting them on.
Making your own shoe rack bench is easier than you think, and it can save you money while adding a personal touch to your home. In this guide, you’ll discover simple steps to build a shoe rack bench that fits your space and style perfectly.
Ready to transform your cluttered entryway into a neat, inviting area? Let’s get started!
Materials And Tools Needed
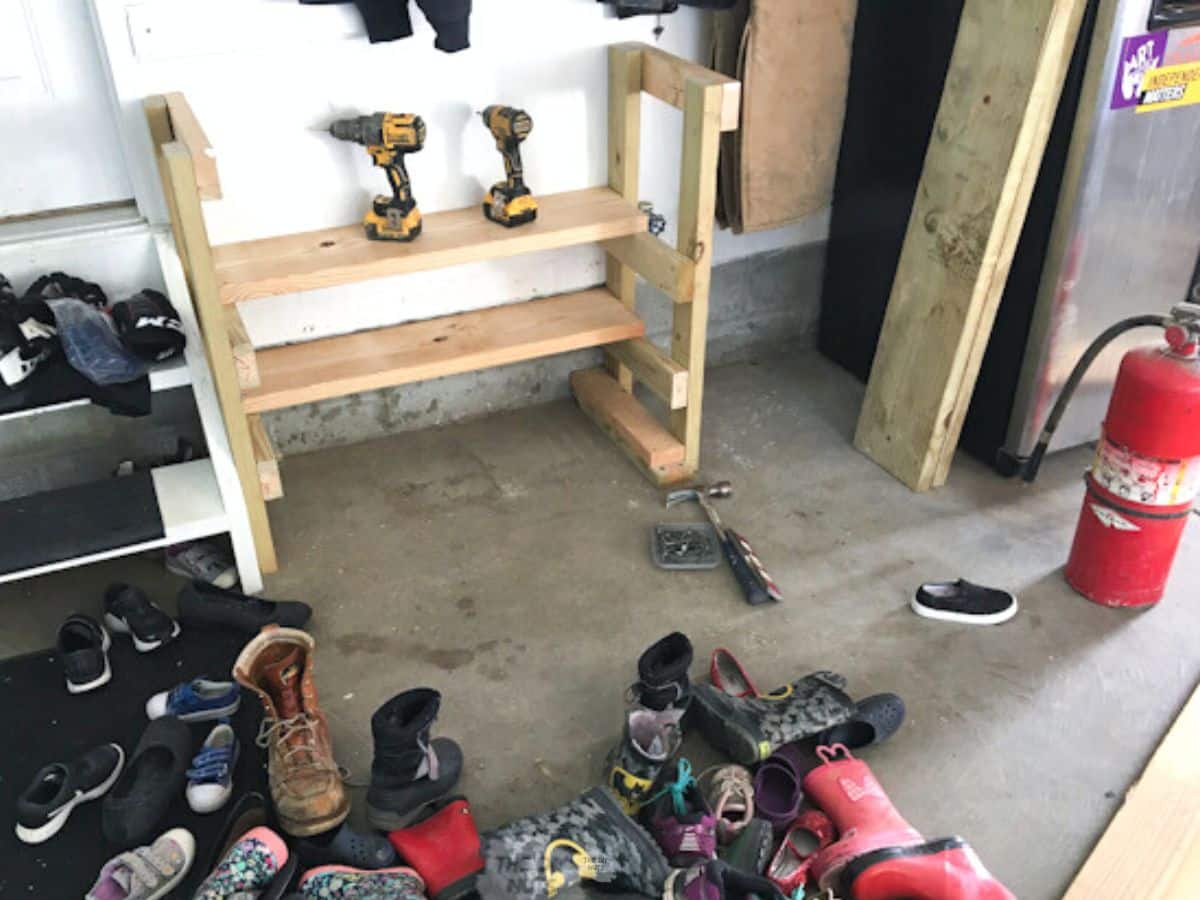
Choosing the right woodis key for a sturdy shoe rack bench. Pine is soft, easy to cut, and affordable. Oak is hard and durable but costs more. Plywood works well for shelves and sides. Make sure the wood is smooth and free from cracks.
Essential tools include a saw for cutting wood to size, a drill for making holes, and a screwdriver for screws. Sandpaper helps smooth rough edges. A measuring tape ensures accurate cuts. A hammer may be needed for nails or tapping parts together.
| Additional Supplies | Hardware |
|---|---|
| Wood glue | Screws (1.5 to 2 inches) |
| Wood filler | Brackets for extra support |
| Paint or wood finish | Sandpaper (medium and fine grit) |
Credit: thediynuts.com
Step-by-step Assembly
Cut wood pieces to the right size using a saw. Sand edges smooth to avoid splinters. Choose sturdy wood like pine or oak for strength. Measure twice, cut once to ensure accuracy.
Build the frame by joining the cut wood pieces. Use wood glue and screws for a strong hold. Make sure corners are square with a carpenter’s square. Let glue dry before moving on.
Attach shelves evenly within the frame using screws. Fix the seating board on top securely. Check that all parts fit tight and are level. Sand any rough spots for a smooth finish.
Finishing Touches
Sandingremoves rough edges for a smooth finish. Use fine-grit sandpaper to avoid scratches. Wipe dust with a damp cloth to keep the surface clean.
Choose paintor stainbased on your style. Paint offers bright colors and full coverage. Stain shows the natural wood grain and adds warmth. Apply thin coats and let dry fully before use.
- Cushionsadd comfort and style. Pick colors that match your room.
- Decorative elementslike throw pillows or small plants bring charm.
- Secure cushions with ties or non-slip backing to keep them in place.

Credit: www.etsy.com

Credit: www.ana-white.com
Frequently Asked Questions
What Materials Are Needed To Build A Shoe Rack Bench?
To build a shoe rack bench, you need wood planks, screws, sandpaper, paint, and a drill. Optionally, add cushions for comfort. These materials are affordable and easy to find in hardware stores, making the project simple and budget-friendly.
How Much Time Does Making A Shoe Rack Bench Take?
Building a shoe rack bench typically takes 3 to 5 hours. Time varies based on your experience and design complexity. Allow extra time for drying paint or finish to ensure durability and a polished look.
Can I Customize The Size Of My Shoe Rack Bench?
Yes, you can customize the size to fit your space. Measure your area and adjust wood plank lengths accordingly. Customizing ensures the bench fits perfectly and maximizes shoe storage efficiency.
What Tools Are Essential For This Diy Project?
Essential tools include a drill, screwdriver, measuring tape, saw, and sandpaper. These tools help cut, assemble, and smooth the wood. Having the right tools makes the building process efficient and safe.
Conclusion
Creating your own shoe rack bench is simple and rewarding. You save money and add a personal touch. This project suits any skill level. With basic tools and materials, success is within reach. A homemade bench organizes shoes and enhances decor.
Crafting it yourself brings satisfaction and functionality. Follow these steps to enjoy a clutter-free entryway. Gather your tools, dedicate some time, and start building. Soon, you’ll have a sturdy and stylish shoe rack bench. Enjoy your new, organized space.


