Imagine sinking into your Adirondack chair after a long day, feeling total comfort as you stretch out your legs on a perfectly crafted footrest. You don’t have to buy one or settle for less—because you can build your own Adirondack chair footrest with simple tools and easy steps.
In this guide, you’ll discover how to create a sturdy, stylish footrest that matches your chair and enhances your relaxation. Ready to add that extra touch of comfort to your outdoor space? Let’s dive in and make your seating experience truly unbeatable.

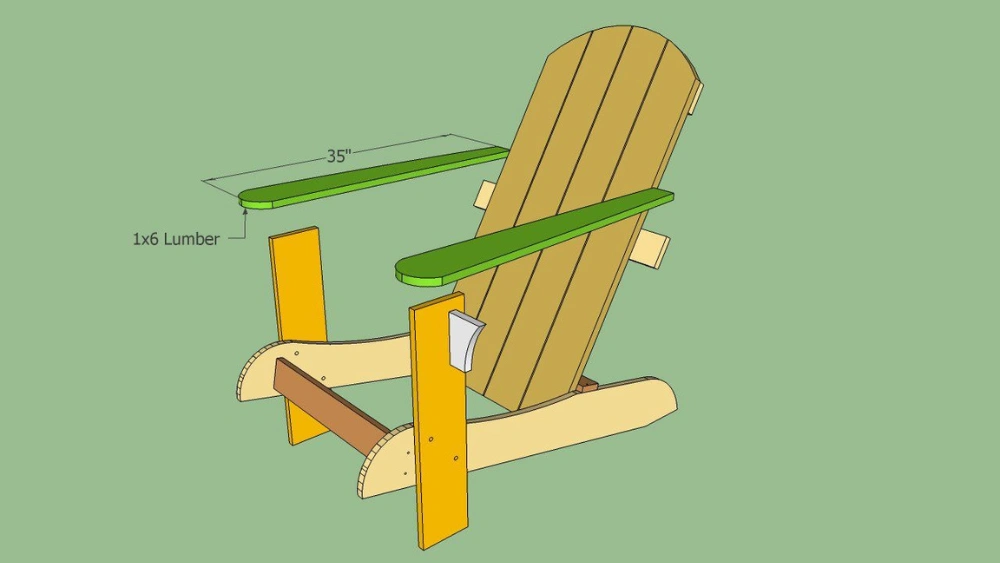
Credit: taso.mn
Materials And Tools Needed
Building an Adirondack chair footrest is a simple project. You need the right materials and tools to get started. This guide lists everything required to make the process smooth and easy.
Choosing good quality wood and having the correct tools will help you build a sturdy footrest. Below are the details of what you will need.
Wood Materials
Select wood that is durable and weather-resistant. Cedar and pine are common choices for outdoor furniture. Make sure the wood is smooth and free of cracks.
- Cedar boards (1×4 inches and 1×6 inches)
- Pine boards (optional alternative)
- Wood screws (1 ¼ inch and 2 ½ inch)
- Wood glue
- Sandpaper (medium and fine grit)
- Outdoor wood finish or paint
Tools Required
Having the right tools will make the assembly easier and safer. Most tools are common in a basic woodworking kit.
| Tool | Purpose |
| Measuring tape | Measure wood pieces accurately |
| Pencil | Mark cutting lines and drill spots |
| Saw (circular or handsaw) | Cut wood pieces to size |
| Drill with drill bits | Make pilot holes and drive screws |
| Screwdriver | Tighten screws firmly |
| Clamps | Hold pieces in place during glue drying |
| Sandpaper or electric sander | Smooth the wood surfaces |
Cutting And Preparing Wood
Building an Adirondack chair footrest starts with cutting and preparing the wood. Precision is key to ensure your footrest is sturdy and comfortable.
This guide will walk you through the essential steps of cutting and preparing the wood pieces for your project.
Selecting The Right Wood
Choosing the right type of wood is important. Hardwoods like cedar or teak are durable and weather-resistant, making them ideal for outdoor furniture.
- Cedar: Lightweight and resistant to decay
- Teak: Highly durable and naturally oily
- Pine: Affordable and easy to work with
Measuring And Marking
Accurate measurements are crucial for a perfect fit. Use a measuring tape and a carpenter’s pencil to mark where you will cut.
| Part | Length | Width |
| Legs | 24 inches | 2 inches |
| Top Slat | 18 inches | 3 inches |
| Support Beam | 20 inches | 2 inches |
Cutting The Wood
Use a saw to cut the wood according to your marked lines. A circular saw is best for straight cuts, while a jigsaw works well for curves.
Ensure all edges are smooth after cutting. Sandpaper can help you achieve a polished finish, which is essential for safety and aesthetics.
Assembling The Footrest Frame
Building the footrest frame for your Adirondack chair is an important step. It provides support and comfort for your feet. This guide will help you put together the frame easily.
Make sure you have all the materials and tools ready. Follow the steps carefully to ensure a strong and stable footrest frame.
Gathering Materials And Tools
You need wood pieces cut to size, screws, wood glue, and clamps. Tools include a drill, screwdriver, measuring tape, and a square for accuracy.
- Wood pieces: two side rails and three slats
- Wood screws, 1¼ inch long
- Wood glue for extra strength
- Drill with screwdriver bit
- Measuring tape
- Carpenter’s square
- Clamps to hold pieces while drying
Preparing The Wood Pieces
Check that all wood pieces are smooth and cut to the right length. Sand any rough edges to avoid splinters. Mark where the slats will attach to the side rails.
Assembling The Frame
Start by attaching the side rails. Use wood glue on the ends and line up the pieces carefully. Clamp them in place to keep steady.
- Apply wood glue along the edges of the slats.
- Place the slats evenly between the side rails.
- Use the carpenter’s square to check for right angles.
- Drill pilot holes to prevent wood from splitting.
- Screw the slats to the side rails securely.
- Remove clamps after the glue dries.
Checking Frame Stability
| Check Point | What to Do | Result |
|---|---|---|
| Joints | Push gently on each joint | No movement or gaps |
| Slats | Press on slats | Firm and steady, no wobble |
| Overall Frame | Set frame on flat surface | Frame sits flat without rocking |
Credit: blessedandpreciouschildrenacademy.com
Finishing Touches And Maintenance
After building your Adirondack chair footrest, finishing touches make it look great. Proper maintenance keeps it strong and safe.
These simple steps help your footrest last for years. You will enjoy comfort and style with little effort.
Sanding And Smoothing
Start by sanding all surfaces to remove rough spots. Use fine-grit sandpaper for a smooth finish.
Sanding prevents splinters and makes the footrest comfortable to touch. Check edges and corners carefully.
Applying Protective Finish
Apply a protective finish to guard the wood from weather damage. Use outdoor wood sealant or paint.
Follow the product instructions for drying time. Applying two coats gives better protection.
- Use waterproof sealant for rain protection
- Choose UV-resistant finish to prevent fading
- Apply paint for color and extra shield
Regular Cleaning
Clean the footrest often to keep dirt and grime away. Use a soft brush or cloth and mild soap.
Avoid harsh chemicals that can damage the finish. Rinse with water and let it dry fully.
Checking For Damage
Look for cracks, loose screws, or worn wood regularly. Fix issues before they get worse.
Tighten screws and sand rough areas as needed. Replace parts if damage is severe.
Storing During Harsh Weather
Store the footrest indoors or under cover during winter or heavy rain. This prevents water damage.
If indoor storage is not possible, use a waterproof cover. Make sure it fits well and allows air flow.

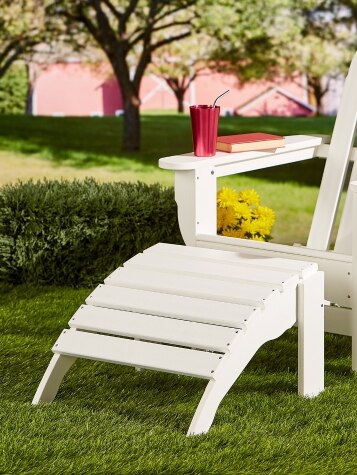
Credit: www.reddit.com
Frequently Asked Questions
What Materials Are Needed To Build An Adirondack Chair Footrest?
You need cedar or pine wood, wood screws, waterproof glue, sandpaper, and wood stain. These materials ensure durability and a smooth finish for your footrest.
How Long Does It Take To Build An Adirondack Chair Footrest?
Building a footrest typically takes 2 to 4 hours. This depends on your skill level and the tools available. Planning and preparation can reduce the overall time.
Can I Customize The Size Of The Adirondack Chair Footrest?
Yes, you can adjust the footrest dimensions to fit your chair. Measure your chair’s height and width before cutting wood. Custom sizing improves comfort and usability.
What Type Of Finish Is Best For Outdoor Adirondack Footrests?
Use exterior-grade wood stain or sealant. This protects the footrest from moisture, UV rays, and weather damage. Reapply the finish annually for lasting protection.
Conclusion
Building an Adirondack chair footrest adds comfort to your seating. It does not take long to make one yourself. Follow the steps carefully and use the right materials. A sturdy footrest fits perfectly with your chair. Enjoy relaxing with your feet raised after a long day.
This small project brings big comfort to your outdoor space. Try building one and see how much you like it. Simple tools and patience will help you finish easily. Your chair becomes more inviting and cozy with this addition.


