Are you tired of cluttered closets that make it hard to find what you need? Imagine having a wooden closet system designed just for your space—sturdy, stylish, and perfectly organized.
Building your own wooden closet system might sound tricky, but with the right steps, you can create a personalized storage solution that fits your needs and your budget. In this guide, you’ll discover simple, clear instructions to help you build a closet system that brings order and beauty to your home.
Ready to transform your closet and make every item easy to find? Let’s get started!
Planning Your Closet Layout
Building a wooden closet system starts with a clear plan. You need to think about space, materials, and how to organize your items.
Good planning saves time and helps you create a closet that fits your needs perfectly.
Measuring Space Accurately
Begin by measuring the area where you want to build the closet. Use a tape measure for length, width, and height. Write down each number clearly.
- Measure the width of the wall from end to end.
- Check the height from floor to ceiling.
- Note any doors, windows, or vents that affect space.
- Measure depth available for shelves and rods.
Choosing Materials
Select wood types and hardware that suit your style and budget. Think about durability and look.
| Material | Features | Cost |
| Plywood | Strong and smooth surface | Medium |
| Solid Wood | Durable and natural look | High |
| MDF | Affordable and easy to paint | Low |
| Hardware | Includes hinges, handles, and rods | Varies |
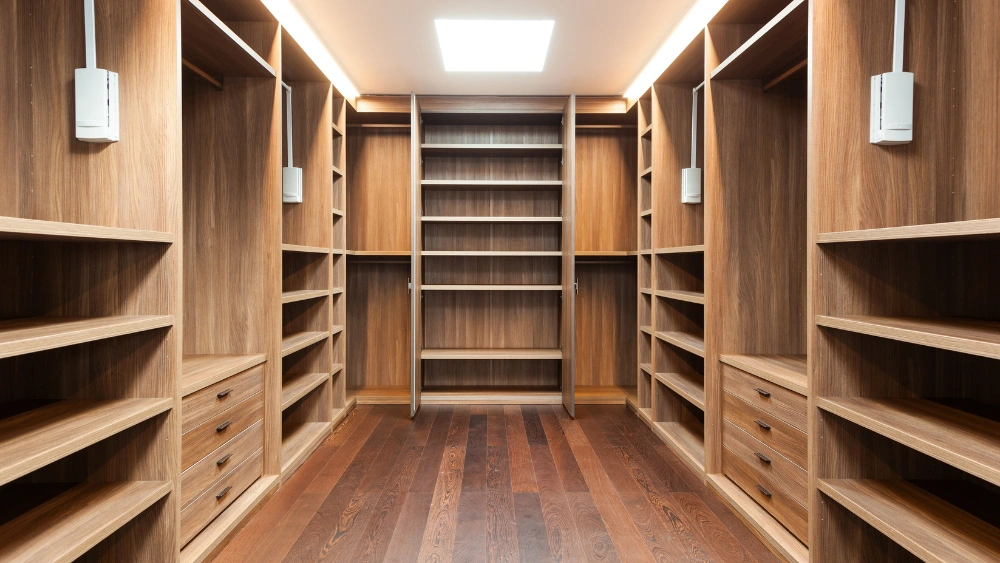
Designing Storage Zones
Divide the closet into zones for different items. This keeps things neat and easy to find.
- Hanging zone for shirts, dresses, and coats.
- Shelf zone for folded clothes and boxes.
- Drawer zone for small items like socks and accessories.
- Shoe zone at the bottom for footwear.
Credit: www.familyhandyman.com
Gathering Tools And Supplies
Building a wooden closet system requires the right tools and materials. Gather everything before starting your project to save time and effort.
Let’s explore the essential tools and supplies you need for this task.
Essential Tools List
Having the right tools makes the construction process smoother and more efficient.
- Measuring tape for accurate dimensions
- Saw for cutting wood pieces
- Drill for making holes
- Level to ensure straight lines
- Screwdriver for assembling parts
- Hammer for securing nails
Selecting Wood Types
Choosing the right wood type affects the durability and look of your closet.
Popular choices include:
- Pine: Affordable and easy to work with
- Oak: Strong and has a classic look
- Cedar: Naturally resistant to insects
Hardware And Accessories
Hardware and accessories are crucial for functionality and style.
| Hardware | Purpose |
| Hinges | Attach doors securely |
| Drawer slides | Enable smooth drawer movement |
| Knobs and handles | Provide easy access |
Step-by-step Assembly Guide
Building a wooden closet system can help organize your clothes and accessories. This guide shows simple steps to build it yourself. Follow each part carefully to get a strong and neat closet.
We will cover building the frame, installing shelves and rods, and securing doors and drawers. Each section has clear instructions for easy assembly.
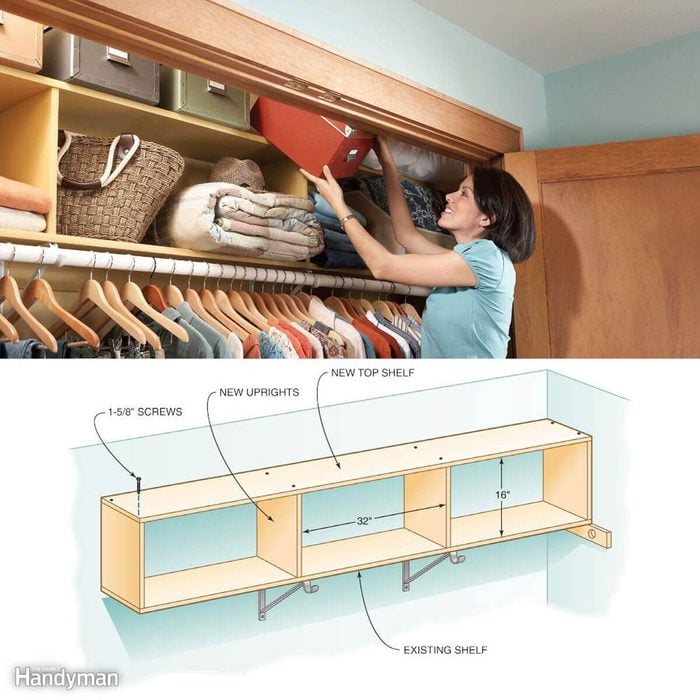
Building The Frame
Start by creating the frame which supports the entire closet system. Use sturdy wooden boards and make sure to measure correctly.
- Cut the side panels and top and bottom boards to size.
- Attach the side panels to the bottom board using wood screws.
- Fix the top board onto the side panels to complete the frame.
- Check the frame for square corners with a carpenter’s square.
- Sand all edges to smooth any rough spots.
Installing Shelves And Rods
After the frame is ready, add shelves and rods to hold clothes and accessories. Proper spacing helps use the space well.
| Item | Recommended Height from Floor | Notes |
| Top Shelf | 72 inches | For boxes or less-used items |
| Clothing Rod | 60 inches | For hanging shirts and jackets |
| Lower Shelf | 36 inches | For shoes or folded clothes |
Use brackets to support shelves and secure rods with mounting hardware. Make sure everything is level before tightening screws.
Securing Doors And Drawers
Finish by attaching doors and drawers. This step protects your clothes and keeps the closet looking tidy.
- Attach hinges to the doors and then fix them to the frame.
- Install drawer slides inside the frame at the correct height.
- Place drawers on the slides and check they open smoothly.
- Add handles or knobs to doors and drawers for easy use.
- Check all screws and fittings are tight and stable.

Credit: www.lemonthistle.com
Finishing Touches And Maintenance
Building a wooden closet system is only part of the job. Adding the right finishes and keeping it clean will extend its life. Good finishing and regular care keep your closet looking fresh and strong.
This guide covers sanding and painting tips, adding organizers, and cleaning advice. Follow these simple steps for a neat and lasting closet system.
Sanding And Painting Tips
Sanding smooths the wood and prepares it for paint or stain. Start with coarse sandpaper and finish with fine grit for a soft finish. Remove dust before painting.
- Use 80-grit sandpaper to remove rough spots.
- Switch to 120-grit for an even surface.
- Finish with 220-grit for smoothness.
- Clean dust with a damp cloth.
- Apply primer before paint or stain.
- Use thin coats to avoid drips.
- Let each coat dry fully before the next.
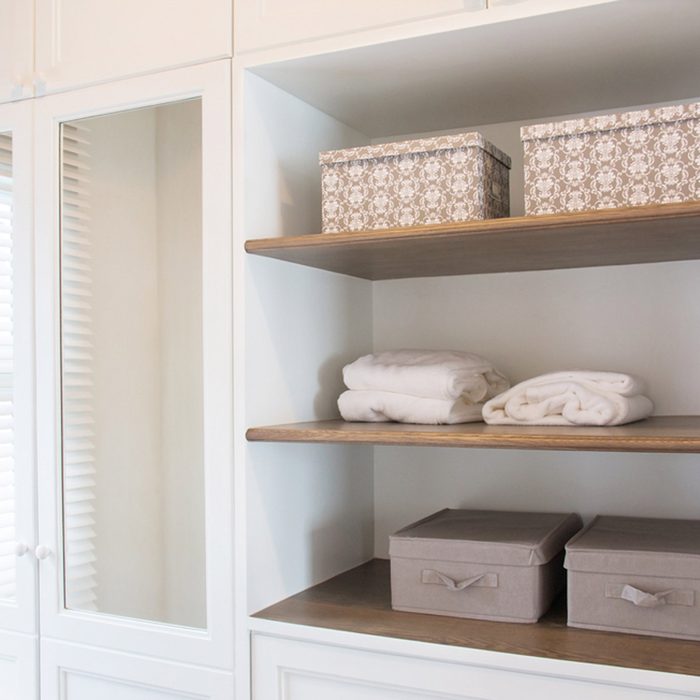
Adding Organizers
Organizers make your closet more useful. Add shelves, drawers, hooks, or baskets to keep items tidy. Plan the layout based on what you store most.
| Type | Use | Material |
| Shelves | Folded clothes, boxes | Wood or metal |
| Drawers | Small items, accessories | Wood or plastic |
| Hooks | Bags, belts, scarves | Metal or plastic |
| Baskets | Shoes, toys | Wicker or fabric |
Cleaning And Upkeep
Keep your wooden closet clean to protect the wood. Dust often and wipe spills quickly. Use mild cleaners to avoid damage.
- Dust shelves weekly with a soft cloth.
- Wipe spills immediately with a damp cloth.
- Use wood-safe cleaner once a month.
- Check for loose screws or fittings every 3 months.
- Apply furniture wax or polish to protect wood yearly.
Credit: www.familyhandyman.com
Frequently Asked Questions
What Materials Are Needed To Build A Wooden Closet System?
You need plywood or solid wood, screws, wood glue, brackets, a saw, measuring tape, and a drill. Choose quality wood for durability and a smooth finish. Proper tools make assembly easier and safer.
How Do I Measure Space For A Wooden Closet System?
Measure width, height, and depth of the closet area accurately. Account for door clearance and shelves. Precise measurements ensure a perfect fit and efficient use of space.
What Is The Best Wood Type For Closet Systems?
Plywood and hardwoods like oak or maple are ideal. They provide strength, durability, and a clean look. Avoid softwoods that may dent or warp easily.
How Long Does It Take To Build A Wooden Closet System?
Building a basic closet system can take 1 to 3 days. Time depends on design complexity, tools, and your woodworking skills. Planning and preparation speed up the process.
Conclusion
Building a wooden closet system takes time and care. Start with a clear plan and the right tools. Measure your space carefully before cutting any wood. Assemble the pieces step by step, checking your work often. A well-built closet keeps your items organized and easy to find.
Your effort will pay off with a strong, useful storage space. Enjoy the satisfaction of creating something with your own hands. Keep your closet tidy and adjust shelves as needed. This project can improve your home and daily routine.


