
Are you ready to organize your space with a sturdy Uline shelving unit but worried about the assembly process? You don’t need to be a handyman to get it done.
With the right steps and a little patience, you can build your shelving unit quickly and confidently. Imagine having a clean, clutter-free area where everything has its place—this guide will help you make that happen. Keep reading, and you’ll discover simple, clear instructions that turn a daunting task into an easy DIY success.
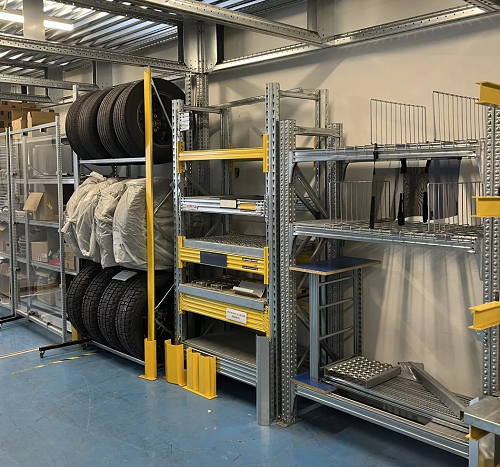
Your perfect storage solution is just a few steps away!
Credit: www.storwell.com
Preparing Your Workspace
Setting up a proper workspace is important for easy assembly. A clear and organized space helps prevent mistakes.
Before starting, take time to prepare everything needed. This makes the process faster and safer.
Gathering Tools And Materials
Collect all tools and parts before you begin. This stops you from searching in the middle of assembly.
- Screwdriver (Phillips and flathead)
- Rubber mallet
- Adjustable wrench
- Measuring tape
- Level tool
- The Uline shelving unit parts and hardware
- Instruction manual
Clearing The Assembly Area
Choose a large, flat surface to work on. Remove any obstacles to avoid accidents.
- Move furniture and clutter out of the way.
- Ensure good lighting for better visibility.
- Keep a trash bin nearby for packaging waste.
- Allow enough room to spread parts comfortably.
Checking The Shelving Parts
Verify all parts are included and undamaged. This avoids delays and missing pieces later.
| Part | Quantity Needed | Check |
|---|---|---|
| Upright Posts | 4 | Free of dents, bends |
| Shelves | 4 or more | Clean, no cracks |
| Cross Braces | 2 or more | Straight, no rust |
| Screws and Bolts | Complete set | All pieces counted |
| Plastic Caps | 4 | Undamaged |

Credit: www.youtube.com
Setting Up The Frame
Setting up a Uline shelving unit is easy if you follow the steps. You can do it alone without needing special tools.
This guide will help you assemble the frame by focusing on the key components. Let’s get started!
Assembling The Upright Posts
Begin by laying out all the upright posts on the floor. Make sure you have the right number of posts for your shelving unit.
Stand each post upright and check that they are secure. They will form the main support for your shelves.
- Lay all posts flat first
- Stand posts upright
- Ensure stability
Connecting The Cross Braces
Cross braces add strength to the frame. Attach them to the upright posts next.
Align the holes on the cross braces with those on the posts. Use screws to connect them securely.
- Align holes on braces and posts
- Use screws to attach
- Check for tight connections
Securing The Frame Components
Once everything is in place, ensure all parts are tightly secured. This ensures your shelving unit is stable and safe.
Double-check each screw and brace to avoid any wobbles. A stable frame is crucial for holding items safely.
- Check all screws
- Ensure no parts are loose
- Stability is key
Installing The Shelves
Installing shelves on your Uline shelving unit is a simple task. It helps to have clear steps to place and secure each shelf properly.
Following the right process ensures your shelves hold weight safely and last a long time.
Positioning Shelf Supports
Start by finding the right spots to place the shelf supports. These supports hold your shelves in place.
Make sure the supports fit into the slots on the upright posts and are level on both sides.
- Check that supports are at the same height on all posts
- Insert supports firmly into the slots
- Use a level to confirm even placement
Placing And Leveling Shelves
Once the supports are set, place the shelf onto them. The shelf should sit flat without wobbling.
Use a level to check the shelf surface. Adjust supports if the shelf tilts or feels uneven.
- Carefully lower the shelf onto the supports
- Check for gaps between shelf and supports
- Adjust supports to make shelf perfectly level
Ensuring Stability And Safety
After placing shelves, check the entire unit for stability. A stable unit holds items safely.
Tighten any loose parts and confirm shelves do not move when pressed.
- Press down on shelves to test firmness
- Secure any loose connections on the frame
- Place heavier items on lower shelves for balance

Credit: www.youtube.com
Final Checks And Adjustments
After assembling your Uline shelving unit, it is important to do final checks. These steps help keep the shelves safe and sturdy. Small adjustments can improve the overall look and function.
Take your time to review each part. This ensures the unit will hold your items well and last a long time.
Tightening Bolts And Screws
Check all bolts and screws to make sure they are tight. Loose hardware can cause the shelves to wobble or fall.
Use a wrench or screwdriver to secure every bolt and screw firmly. Avoid over-tightening to prevent damage.
- Inspect each bolt and screw
- Use proper tools for tightening
- Do not force bolts too hard
- Ensure all parts feel stable
Verifying Shelf Alignment
Look at each shelf to see if it is level and straight. Misaligned shelves may cause items to slide off.
Adjust the shelves by loosening the brackets slightly, then repositioning them. Tighten the brackets again once aligned.
- Check shelf edges for even height
- Use a level tool if available
- Adjust brackets carefully
- Confirm shelves do not tilt
Cleaning And Organizing The Unit
Wipe down the shelves with a clean cloth to remove dust and fingerprints. Clean shelves look better and last longer.
Arrange your items neatly on the shelves. Organizing helps you find things quickly and keeps the area tidy.
- Use a soft, dry cloth for cleaning
- Place heavier items on lower shelves
- Keep frequently used items within reach
- Leave space between items for air flow
Frequently Asked Questions
How Long Does It Take To Assemble A Uline Shelving Unit?
Assembling a Uline shelving unit typically takes 30 to 60 minutes. Time varies based on your experience and tools available. Clear instructions and organized parts speed up the process significantly.
What Tools Are Needed For Uline Shelving Assembly?
You need a rubber mallet, screwdriver, and level. These tools help secure shelves and ensure stability. Most Uline units come with assembly instructions specifying required tools.
Can I Assemble Uline Shelving Alone?
Yes, Uline shelving units are designed for easy solo assembly. Clear instructions and lightweight parts make it manageable. However, extra help can speed up larger unit setups.
How Do I Ensure Uline Shelves Are Level?
Use a bubble level during assembly to align shelves evenly. Adjust feet or shelf positions as needed. Proper leveling prevents items from sliding and maintains unit stability.
Conclusion
Assembling your Uline shelving unit is simple and rewarding. Follow the steps carefully, and take your time. Use the right tools and check each part before starting. You will enjoy having a strong, useful shelf for your space. This project saves money and gives a sense of achievement.
Keep instructions close and work patiently. Soon, your shelving unit will be ready to hold your items neatly. A little effort leads to great results.


