Are you tired of tripping over shoes every time you walk through your door? A shoe bench can be the perfect solution, providing both storage and a convenient spot to sit while putting on your shoes.
But what if you don’t have the skills or equipment to sew one yourself? Don’t worry, you don’t need to be a DIY expert to create a functional and stylish shoe bench. In this guide, you’ll discover how to make a no-sew shoe bench that’s easy to assemble and customize to match your home decor.
Stick with us, and you’ll be amazed at how simple it can be to organize your entryway without picking up a needle and thread. Ready to transform your space and impress your guests? Let’s get started!
Materials Needed
Choose a sturdy base for your bench. Wood crates, old drawers, or a simple wooden box work well. Make sure it can hold weight and fits your space.
Pick fabric that is strong and easy to clean. Cotton, canvas, or faux leather are good choices. Soft foam or batting will make the seat comfy.
| Tool or Supply | Purpose |
|---|---|
| Staple gun or heavy-duty tape | To attach fabric and padding securely |
| Scissors | To cut fabric and foam |
| Measuring tape | To measure fabric and bench size |
| Marker or chalk | To mark cutting lines on fabric |
Credit: www.costco.com
Step-by-step Assembly
Start by cleaning the bench surface well. Remove dust and dirt to help fabric stick better. Use sandpaper if the surface is rough. This creates a smooth base.
Cut fabric larger than the bench top. Place padding on the bench first. Smooth it out to avoid lumps or bumps.
- Use fabric glue or double-sided tape for attaching fabric.
- Press fabric firmly onto padding and bench edges.
- Wrap fabric tightly around the edges for a neat look.
Staple the fabric underneath the bench to keep it secure. Use a staple gun or heavy-duty staples. Check if padding stays in place. Add more staples if needed.
Styling And Storage Tips
Organizing shoes efficientlyhelps keep your space neat. Use baskets or boxes under the bench to store shoes not worn daily. Arrange shoes by type or color for easy picking. Open shelves let you see all shoes quickly. Keep frequently used shoes at eye level. This saves time and reduces clutter.
Adding decorative elementsmakes the bench inviting. Place small plants or vases on top. Use cushions with bright colors or patterns for comfort and style. Choose decor that matches your room’s theme. Simple details create a warm, welcoming feel.
Maintaining your benchkeeps it looking fresh. Wipe surfaces regularly with a damp cloth. Check for loose parts and tighten them. Rotate cushions to avoid wear. Keep shoes clean before placing them on the bench to avoid stains.
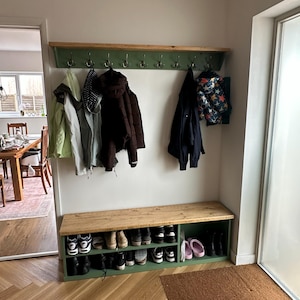
Credit: www.etsy.com
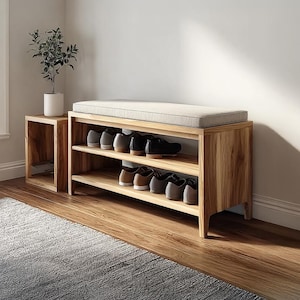
Credit: www.etsy.com
Frequently Asked Questions
What Materials Are Needed To Make A No-sew Shoe Bench?
You need fabric, foam padding, a wooden bench frame, and adhesive spray. Optional items include decorative trim and non-slip pads.
How Long Does It Take To Build A No-sew Shoe Bench?
It usually takes 1-2 hours depending on your preparation and drying time for adhesives. It’s a quick DIY project.
Can I Customize The Size Of My No-sew Shoe Bench?
Yes, you can choose any bench size. Just cut the fabric and foam to fit your frame perfectly.
Is No-sew Shoe Bench Durable For Daily Use?
With quality materials and strong adhesive, it can last long. Avoid heavy weight to maintain its structure.
Conclusion
Creating a no sew shoe bench is simple and fun. You can use easy tools and materials. This project saves money and adds style to your home. It also gives you a place to sit and store shoes. Anyone can make one with little effort.
Try it today and enjoy a neat, useful bench. You will feel proud of your handmade creation.


