
Have you ever wanted a stylish console table that perfectly fits your space and taste? Making your own console table is easier than you think—and it can save you money while giving your home a unique touch.
Imagine having a piece that not only looks great but also carries your personal style. In this guide, you’ll discover simple steps and handy tips to create a console table that suits your needs. Ready to build something special? Let’s get started!
Choosing Materials
Choosing the right woodis key to making a strong console table. Oak and maple are tough and last long. Pine is softer but easy to work with and cheaper. Walnut and cherry add a nice dark color and look elegant.
Prepare your tools before starting. Basic tools include:
- Saw for cutting wood
- Drill for screws
- Sandpaper to smooth surfaces
- Measuring tape for accuracy
- Wood glue for extra hold
- Screws and nails
Make sure your workspace is clean and safe. Having all tools ready saves time and effort.

Credit: www.homebyhiliary.com
Building The Frame
Measure the wood pieces carefully before cutting. Use a tape measure for accuracy. Mark the cut lines clearly with a pencil. Cut the wood using a saw, following the marks closely. Smooth the edges with sandpaper to avoid splinters.
Assemble the base by joining the cut pieces of wood. Use wood glue to hold them together firmly. Reinforce the joints with screws or nails for extra strength. Make sure the base is level and stable before moving on.
Finishing Touches
Choose the right finish to protect your console table and enhance its look. Sand smoothly, apply paint or stain evenly, and seal with a clear coat for durability. Small details like handles or decorative accents add charm and personality.
Sanding And Smoothing
Use sandpaper to smooth the surface of the console table. Start with a coarse grit to remove rough spots. Then, use a finer grit for a smooth finish. Sand along the wood grain to avoid scratches. Wipe away dust with a clean cloth before painting or staining.
Applying Paint Or Stain
Choose paint or stain based on the look you want. Apply thin, even coats using a brush or cloth. Let each coat dry completely before adding another. For a natural wood look, use stain and finish with a clear sealant. Paint offers more color options and protection.

Credit: www.ana-white.com
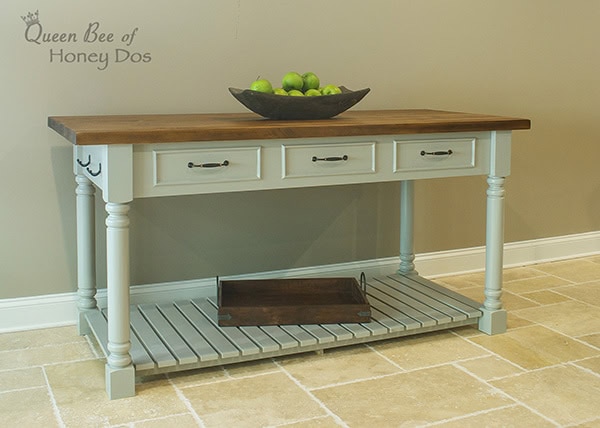
Credit: www.queenbeeofhoneydos.com
Frequently Asked Questions
What Materials Do I Need To Build A Console Table?
You need wood planks, screws, a drill, sandpaper, wood glue, and finish. Choose quality wood like pine or oak for durability and style.
How Long Does It Take To Make A Console Table?
Making a console table usually takes 4 to 6 hours. This includes measuring, cutting, assembling, sanding, and finishing.
Can Beginners Build A Console Table Easily?
Yes, beginners can build a simple console table. Follow step-by-step instructions and use basic tools for best results.
What Tools Are Essential For Making A Console Table?
Essential tools include a saw, drill, screwdriver, measuring tape, and clamps. These tools help ensure accuracy and sturdy assembly.
Conclusion
Creating your own console table is rewarding and fun. With simple tools and materials, you can craft a unique piece. Follow the steps and watch your vision come to life. Enjoy the process of building. Each step adds personal touch and character.
You’ll have a beautiful table that fits your style. Plus, it saves money and adds a personal touch. Share your creation with friends and family. They’ll admire your craftsmanship and creativity. Start today and see how easy it is. A little effort brings great satisfaction.
Happy crafting!


