
Are you looking to add a stylish and practical touch to your space? Hanging your Ruche shelving unit the right way can make all the difference.
But if you’re unsure where to start or worried about making mistakes, you’re not alone. This guide will walk you through simple, step-by-step instructions to hang your shelving unit securely and beautifully. By the end, you’ll feel confident and ready to transform your wall into a smart storage solution.
Keep reading—you’re just moments away from mastering the perfect shelf setup!
Tools And Materials Needed
Hanging a Ruche shelving unit is simple with the right tools and materials. You will need some basic equipment to ensure the shelves are secure and level.
This guide lists the essential tools and materials to help you prepare before starting the installation.
Drill And Drill Bits
A drill makes holes in the wall for screws and anchors. Use drill bits that match the size of your wall anchors.
- Electric drill (corded or cordless)
- Drill bits for wood, drywall, or masonry
- Small drill bit for pilot holes
Wall Anchors And Screws
Wall anchors hold the screws tightly in the wall. Choose anchors based on your wall type and shelf weight.
- Plastic or metal wall anchors
- Screws that fit the shelving unit brackets
- Check anchor weight rating for safety
Level And Measuring Tape
A level helps keep shelves straight and balanced. Measuring tape ensures correct placement and spacing.
- Bubble or digital level
- Measuring tape with inches and centimeters
- Marking pencil for placement
Screwdriver Or Screw Gun
Use a screwdriver or screw gun to fasten screws into the wall anchors. Choose the right tip size for your screws.
- Manual screwdriver (Phillips or flathead)
- Electric screw gun for faster work
- Bits matching screw heads
Stud Finder (optional)
A stud finder locates wall studs behind drywall. Mounting shelves on studs provides extra strength.
- Electronic or magnetic stud finder
- Helps avoid drilling into pipes or wires
- Improves shelf stability
Ruche Shelving Unit Components
Gather all parts of the Ruche shelving unit before starting. Check for any missing pieces or damage.
- Shelves
- Brackets or mounting hardware
- Instructions manual
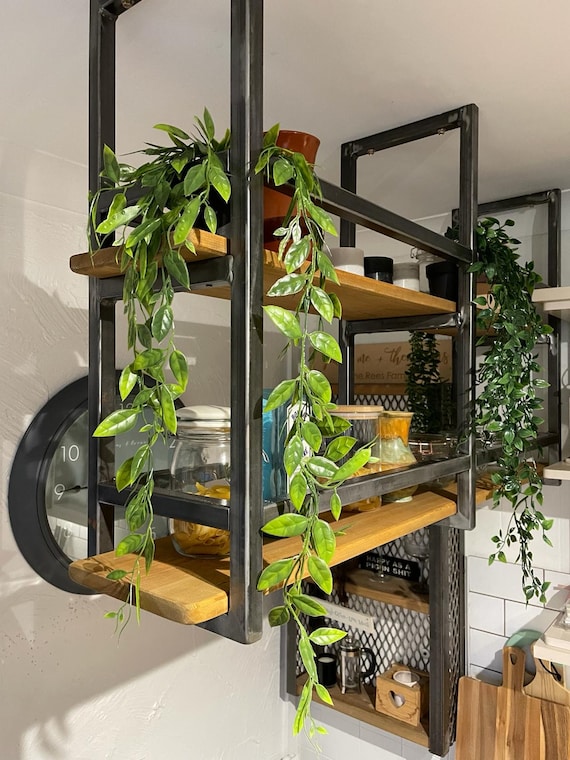
Credit: www.etsy.com
Preparing The Wall
Before you hang a ruche shelving unit, you must prepare the wall. This ensures stability and safety for your shelves.
Follow these steps to make sure your wall is ready for installation. Proper preparation is key to a successful setup.
Check Wall Material
Different wall materials require different anchors and screws. Identify if your wall is drywall, plaster, or concrete.
- Drywall: Use anchors that expand for a secure fit.
- Plaster: Drill carefully to avoid cracking.
- Concrete: Use masonry screws and a hammer drill.
Locate Wall Studs
Studs provide solid support for heavy shelves. Use a stud finder to locate them behind your wall.
Tip: Knock on the wall to find hollow and solid areas.
Measure And Mark
Accurate measurements prevent mistakes. Measure twice and mark the spots where the shelves will be mounted.
| Wall Type | Recommended Tools |
| Drywall | Drill, Anchors |
| Plaster | Drill, Anchors |
| Concrete | Hammer Drill, Masonry Screws |
Mounting The Shelving Unit
Mounting the Ruche shelving unit correctly is important for safety and stability. You need the right tools and a clear plan before starting.
This guide will help you install your shelving unit securely on your wall.
Gather Required Tools And Materials
Before you begin, collect all tools and materials. This saves time and avoids interruptions during mounting.
- Drill with appropriate drill bits
- Stud finder
- Level
- Screwdriver
- Wall anchors or screws
- Measuring tape
- Pencil
Locate Wall Studs
Use a stud finder to locate studs behind the wall. Mounting on studs gives the shelving unit strong support.
Mark the stud locations lightly with a pencil. Avoid mounting on drywall alone if possible.
Mark Mounting Points
Hold the shelving unit against the wall at your desired height. Use a level to keep it straight.
Mark the mounting holes on the wall with a pencil for accurate drilling.
Drill Holes And Insert Anchors
Drill holes at the marked points. Choose a drill bit size that fits your screws or anchors.
If you cannot drill into studs, use wall anchors for extra strength. Insert anchors fully into the holes.
| Wall Type | Recommended Anchor | Drill Bit Size |
|---|---|---|
| Wood Stud | No anchor needed | Match screw size |
| Drywall | Toggle bolt | 5/16 inch |
| Concrete or Brick | Masonry anchor | 3/8 inch |
Attach Shelving Unit To Wall
Align the shelving unit with the drilled holes. Insert screws through the mounting holes into the wall.
Tighten screws securely but avoid over-tightening. Check the unit’s level again before finishing.

Credit: www.amazon.ca
Final Adjustments And Tips
After hanging your Ruche shelving unit, it is important to make final adjustments. These steps help keep the unit safe and stable. Follow simple tips to maintain the shelf’s durability.
Check every part of the shelving unit carefully. Small tweaks can prevent damage and keep your items secure. Take your time with this last stage.
Leveling The Shelves
Use a spirit level to check if each shelf is even. Uneven shelves can cause items to slide or fall. Adjust the brackets or supports until the shelves are perfectly level.
Securing The Shelving Unit
Make sure all screws and bolts are tight. Loose fittings may weaken the unit’s hold on the wall. Use a screwdriver to firmly secure each connection point.
- Tighten all mounting screws
- Check wall anchors for stability
- Use a stud finder to confirm secure attachment
- Reinforce brackets if needed
Cleaning And Maintenance Tips
Keep your Ruche shelving unit clean to prolong its life. Dust regularly and wipe with a damp cloth. Avoid harsh chemicals that may damage the finish.
| Maintenance Task | Frequency | Tools Needed |
|---|---|---|
| Dusting | Weekly | Soft cloth |
| Wiping | Monthly | Damp cloth |
| Check Tightness | Every 3 months | Screwdriver |
| Inspect for Damage | Every 6 months | Visual check |
Avoiding Common Problems
Do not overload the shelves beyond their weight limit. Heavy objects can cause the unit to pull away from the wall. Distribute weight evenly across all shelves.

Credit: www.cochingymkhana.com
Frequently Asked Questions
How Do I Install A Ruche Shelving Unit Safely?
To install a Ruche shelving unit safely, use a stud finder to locate wall studs. Securely anchor brackets with appropriate screws. Follow the manufacturer’s instructions carefully to ensure stability and prevent damage.
What Tools Are Needed To Hang Ruche Shelves?
You need a drill, screwdriver, level, stud finder, pencil, tape measure, and wall anchors. These tools ensure precise placement and secure mounting of Ruche shelving units.
Can Ruche Shelves Hold Heavy Items?
Yes, Ruche shelves can hold moderate weight if properly mounted into studs. Avoid overloading to prevent damage. Check the weight limit specified by the manufacturer.
How Do I Level Ruche Shelving Units Correctly?
Use a level tool to check shelf alignment. Adjust bracket positions as needed before securing screws tightly. This ensures your shelves are straight and stable.
Conclusion
Hanging your Ruche shelving unit is easier than it seems. Follow each step carefully for best results. Use the right tools and check wall type first. Secure the brackets tightly to keep shelves stable. Take your time to measure and mark properly.
This helps avoid mistakes and saves effort later. Enjoy your new shelves that add style and storage. Keep these tips handy for any future projects. Your space will look neat and organized in no time.


