
Are you tired of clutter taking over your space? Imagine having sturdy, stylish wood shelving units that perfectly fit your room and needs.
Building your own shelves might seem tricky, but with the right steps, you can create something amazing that lasts for years. In this guide, you’ll discover simple, clear instructions to help you build wood shelving units with confidence. By the end, you’ll not only save money but also enjoy the pride of making something with your own hands.
Ready to transform your space? Let’s get started!
Choosing The Right Materials
Building wood shelving units starts with picking the right materials. The materials affect the strength and look of your shelves.
You want wood and tools that fit your needs and skill level. Good choices make your project easier and better.
Types Of Wood For Shelving
Different woods offer different looks and strengths. Choose wood that can hold weight and matches your style.
Softwoods are easier to work with but may dent. Hardwoods are strong but cost more.
- Pine: A softwood, affordable and easy to cut.
- Oak: A hardwood, very strong and durable.
- Maple: Hard, smooth, and good for a clean look.
- Birch: Hard with a nice grain pattern.
- Plywood: Made from layers, stable and less likely to warp.
Tools And Hardware Needed
You need the right tools to build safe and sturdy shelves. Basic tools help you cut and join wood properly.
Hardware holds your shelves together. Pick strong screws and brackets for support.
- Measuring tape: To measure wood accurately.
- Saw: A hand saw or power saw to cut wood.
- Drill and drill bits: For making holes and driving screws.
- Screwdriver: To tighten screws by hand if needed.
- Wood screws: To join pieces securely.
- Brackets or shelf supports: To hold shelves in place.
- Sandpaper: To smooth rough edges.
Credit: www.woodbrew.tv
Planning Your Shelving Unit
Building wood shelving units can help organize your space. It’s important to plan before you start cutting any wood.
Careful planning ensures your shelves fit well and hold the items you need them to store. Let’s explore key steps in planning.
Measuring And Designing
First, measure the space where you want to place the shelves. Accurate measurements are crucial for a good fit.
- Measure the height, width, and depth of the area.
- Decide how many shelves you need.
- Consider the height between each shelf.
Design your shelves based on these measurements. Sketch a simple plan to visualize your design.
Safety Considerations
Safety is important when building and using shelving units. You don’t want the shelves to collapse or cause injury.
- Use sturdy materials like hardwood for durability.
- Secure shelves to the wall to prevent tipping.
- Check weight limits of shelves and distribute weight evenly.
Following these safety tips can help keep your shelving units secure and long-lasting.
Step-by-step Assembly
Building wood shelving units is a simple project you can do at home. Follow clear steps to make strong shelves.
This guide shows how to cut, prepare, join, and secure your wood shelves safely and correctly.
Cutting And Preparing Wood
Start by measuring the wood pieces carefully. Cut the wood to the right size for your shelves and sides.
Sand the edges and surfaces smooth to avoid splinters. This also helps the paint or finish stick better.
- Measure twice before cutting
- Use a saw suitable for your wood type
- Sand all cut edges evenly
- Clean dust off before assembly
Joining And Securing Shelves
Attach the shelves to the sides using wood screws or nails. Drill pilot holes to prevent wood from splitting.
Check that each shelf is level before fully tightening the screws. Use clamps to hold pieces steady if needed.
- Drill pilot holes for all screws
- Use wood glue for extra strength
- Clamp shelves in place before screwing
- Check shelves are level and square
Credit: www.woodbrew.tv
Finishing Touches
After building your wood shelving units, the finishing touches make a big difference. These steps improve the look and protect your shelves.
Take time to sand, paint, and mount your shelves carefully. These details help your shelves last longer and look great.
Sanding And Painting
Sanding smooths the wood and removes rough spots. Use fine-grit sandpaper for a soft finish.
Painting or staining protects the wood and adds color. Choose a paint that fits your room style.
- Start with light sanding to remove splinters
- Wipe dust off with a clean cloth
- Apply a primer for better paint grip
- Use thin coats of paint and let dry fully
- Finish with a clear sealant for protection
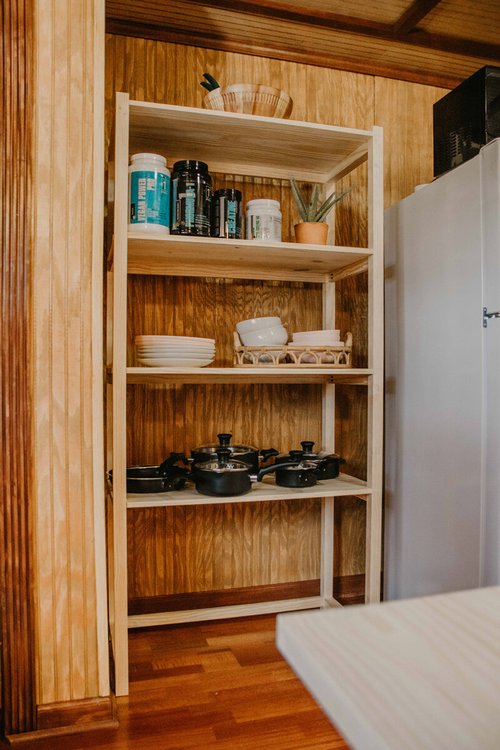
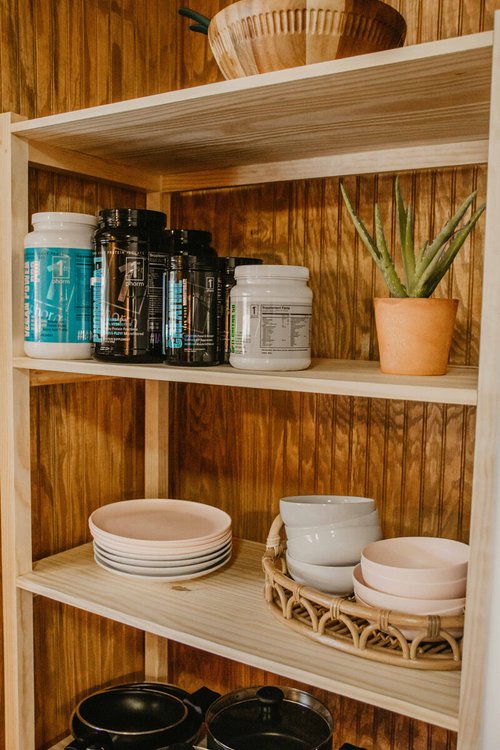
Mounting And Styling Ideas
Mount your shelves securely to support weight. Use wall anchors if needed for extra strength.
Style your shelves with books, plants, or decor. Balance items for a neat and attractive look.
- Find studs in the wall for strong mounting
- Use a level to keep shelves straight
- Mix tall and short items on shelves
- Place heavier items near the wall
- Add small plants for a fresh feel
Credit: medium.com
Frequently Asked Questions
What Tools Are Needed To Build Wood Shelving Units?
Basic tools include a saw, drill, measuring tape, level, and screwdriver. Sandpaper and wood glue are also helpful. These tools ensure precise cuts and sturdy assembly for your shelving units.
How Do I Choose The Right Wood For Shelves?
Select hardwood like oak or maple for durability. Pine is budget-friendly but less strong. Consider weight capacity and aesthetics when choosing wood types.
What Is The Best Way To Secure Shelves To The Wall?
Use wall studs for strong support. Attach brackets or cleats with screws into studs. This prevents shelves from sagging or falling under heavy loads.
How Can I Make Wood Shelves Look Polished?
Sand surfaces smooth and apply primer before painting or staining. Use a clear sealant for added protection. This enhances appearance and durability of your shelves.
Conclusion
Building wood shelving units can be simple and rewarding. Start with clear plans and good tools. Measure twice, cut once, and take your time. Each step adds strength and style to your shelves. You can customize the size and look to fit any space.
Enjoy the process and the final product. With patience, your shelves will last for years. Try this project to add practical beauty to your home.


