
Are you tired of your garage being cluttered and messy? Building your own shelving unit can be the perfect solution to organize your tools, boxes, and gear.
Imagine having a sturdy, custom-made shelf that fits your space perfectly and keeps everything within easy reach. In this guide, you’ll discover simple, step-by-step instructions to build a shelving unit that transforms your garage. Whether you’re a beginner or have some DIY experience, this article will help you create a durable, practical shelf that makes your garage work for you.
Ready to take control of your space? Let’s get started!
Credit: www.modernbuilds.com
Choosing The Right Materials
Building a shelving unit for your garage needs good material choices. Picking the right parts makes the shelves strong and last long.
This guide covers wood types, hardware, and tools you need for your project.
Wood Types And Durability
Choose wood that can hold weight and resist moisture. Pine is cheap but soft. Oak is strong and lasts longer. Plywood is stable and good for shelves.
- Pine:Easy to work with, but dents easily.
- Oak:Hard and durable, good for heavy loads.
- Plywood:Strong layers glued together, resists warping.
- Melamine:Smooth finish, easy to clean, but can chip.
Hardware And Fasteners
Use quality screws and brackets to hold shelves tight. Nails are less strong than screws. Choose rust-resistant hardware for garages.
| Hardware | Use | Material |
|---|---|---|
| Screws | Hold wood pieces firmly | Steel, often coated to resist rust |
| Brackets | Support shelves under weight | Metal, usually powder-coated |
| Anchors | Secure shelves to walls | Plastic or metal, for drywall or masonry |
Tools Needed
Gather tools before starting. They make building faster and safer.
- Measuring tape to get exact sizes
- Power drill for screws and holes
- Level to keep shelves straight
- Saw to cut wood pieces
- Screwdriver for tightening
Credit: www.modernbuilds.com
Planning Your Shelving Unit
Building a shelving unit for your garage is a great way to organize your space. Planning is the first step to ensure a sturdy and useful unit.
Careful planning helps you meet your storage needs and maximize your garage space. Start by understanding the key steps in the planning process.
Measuring Your Garage Space
Accurate measurements are crucial for a well-fitted shelving unit. Measure the length, width, and height of the space where the unit will go.
- Use a tape measure for precise dimensions.
- Consider doorways and windows that might affect placement.
- Account for any obstructions like pipes or outlets.
Designing For Load Capacity
Your shelves need to support the weight of stored items. Design the shelving to handle heavy loads safely.
| Material | Load Capacity |
| Wood | Moderate |
| Metal | High |
| Plastic | Light |
Sketching The Layout
A sketch helps visualize your shelving unit. Draw a simple layout to guide your build.
Use graph paper or a digital tool for a clear sketch. Ensure your design matches the measured space and load requirements.
Building The Shelving Frame
Building a sturdy shelving frame for your garage starts with careful planning. You will need to cut and prepare the wood, assemble the frame, and make sure it is stable. This guide focuses on these key steps to create a strong base.
Taking your time with each step will help you build shelves that last. Follow the instructions below to get a solid frame ready for your garage storage needs.
Cutting And Preparing Wood
Choose quality lumber that can hold weight and last outdoors. Measure and cut the wood pieces to size before assembling. Sand edges to avoid splinters and to help with fitting parts together smoothly.
- Measure twice, cut once to avoid mistakes
- Use a saw to cut wood to the correct lengths
- Sand edges and surfaces to smooth rough spots
- Label pieces to keep track of them during assembly
Assembling The Frame
Start by joining the vertical supports with horizontal beams. Use screws or nails to fasten pieces tightly. Check that corners are square to keep the frame even and balanced.
| Part | Length (inches) | Quantity |
| Vertical Supports | 72 | 4 |
| Horizontal Beams (Shelves) | 36 | 6 |
| Back Supports | 36 | 2 |
Ensuring Stability
Make sure the frame is steady by adding braces and checking alignment. Use a level tool to verify that shelves are flat. Secure the frame to the wall for extra support.
- Add diagonal braces in the back corners
- Tighten all screws after assembly
- Use wall anchors if needed to fix the frame
- Check the frame for wobbling before loading shelves
Finishing Touches And Installation
After building your garage shelving unit, finishing touches make it last longer. Proper installation ensures safety and stability.
This section covers sanding, painting, securing the shelves, and organizing your storage.
Sanding And Painting
Sanding smooths rough edges and prepares wood for paint. Paint protects wood from moisture and dirt.
- Use medium-grit sandpaper for rough surfaces.
- Finish with fine-grit sandpaper for a smooth feel.
- Wipe dust off with a dry cloth before painting.
- Apply primer for better paint adhesion.
- Use outdoor or wood paint for durability.
- Let paint dry fully between coats.
Securing To Wall
Attach the shelving unit firmly to the wall to prevent tipping. Use the right anchors and screws for your wall type.
| Wall Type | Recommended Anchor | Notes |
| Drywall | Toggle bolts | Use studs if possible |
| Concrete | Masonry anchors | Drill pilot holes first |
| Wood Studs | Wood screws | Fasten directly into studs |
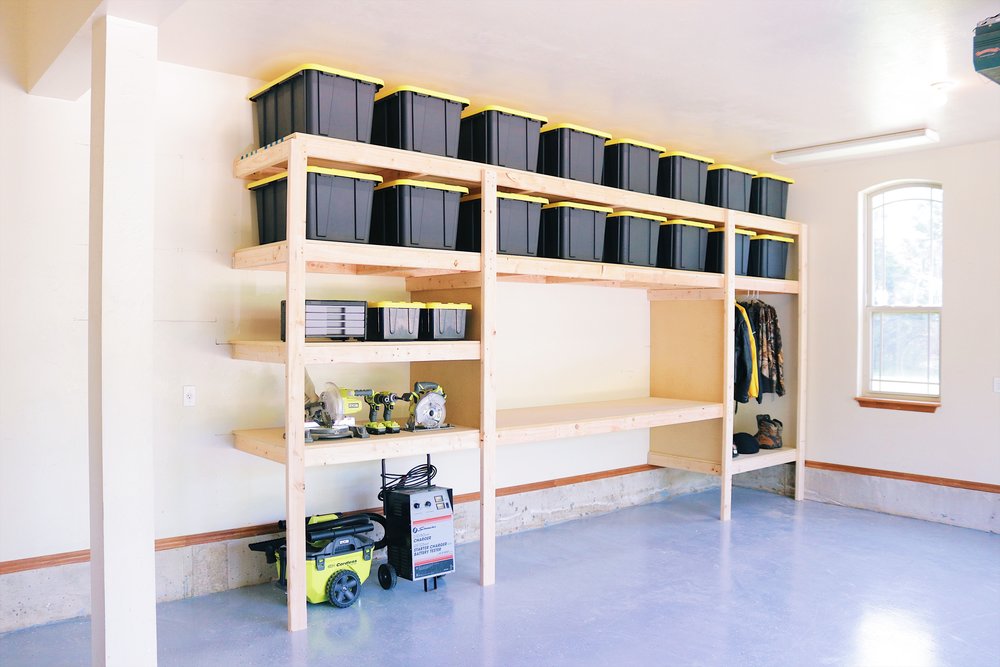
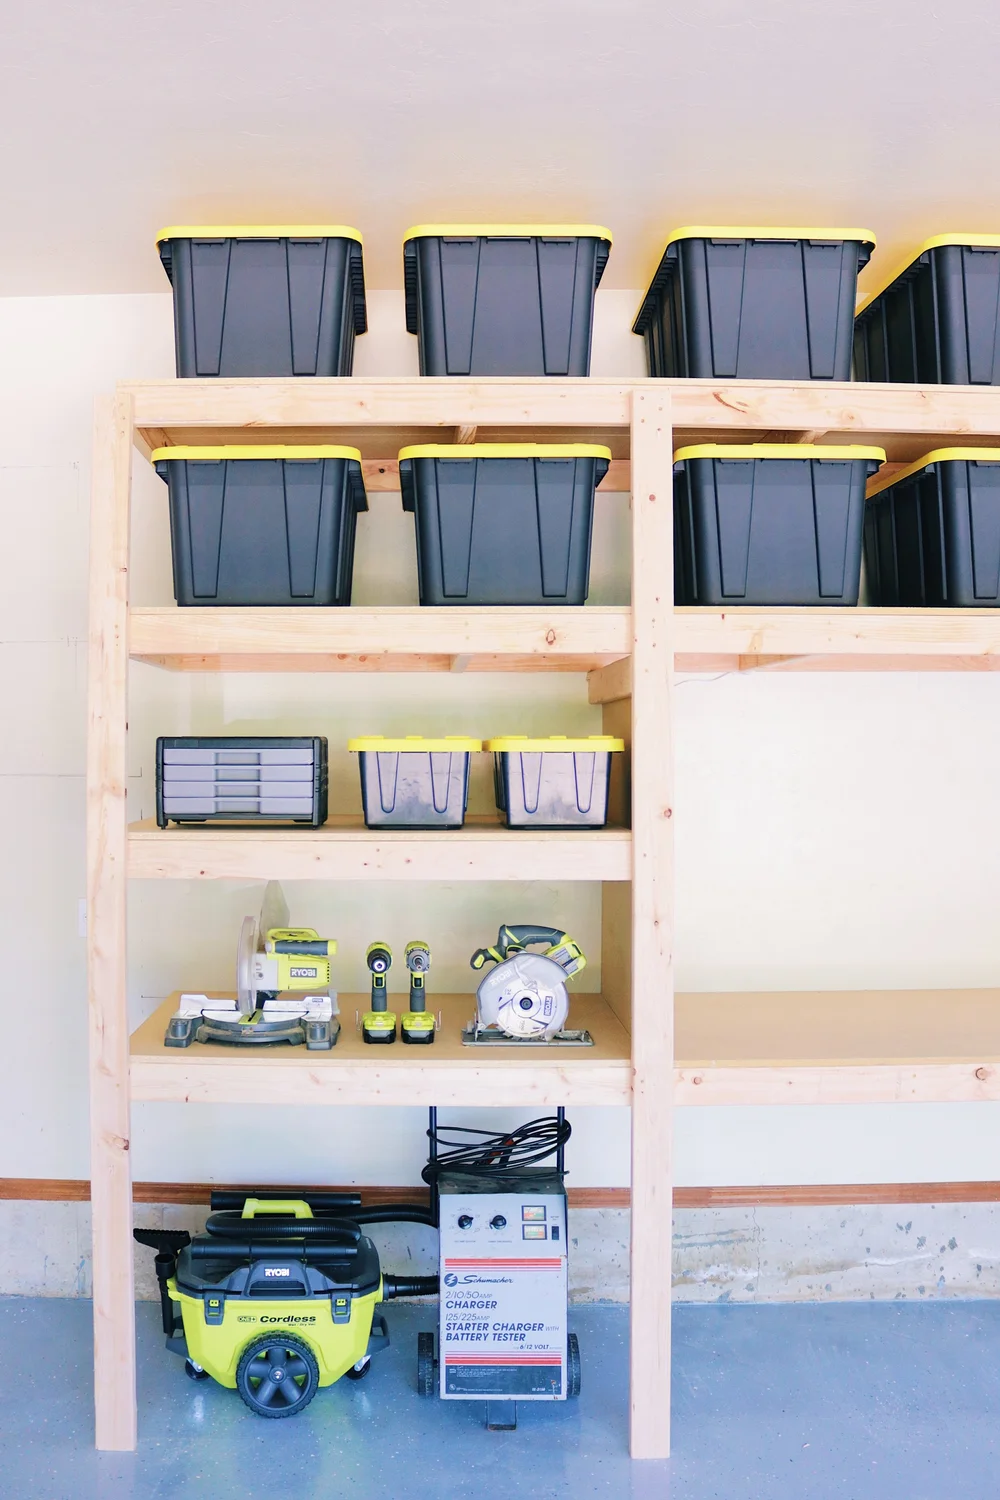
Organizing Your Storage
Organize items on your shelves for easy access and safety. Sort tools, supplies, and boxes by use and size.
- Place heavy items on lower shelves.
- Use clear bins for small parts.
- Label containers for quick finding.
- Keep frequently used items at eye level.
- Leave space to add more items later.

Credit: www.reddit.com
Frequently Asked Questions
What Materials Are Needed To Build A Garage Shelving Unit?
You need plywood or solid wood boards, screws, brackets, a drill, a saw, measuring tape, and a level. Choose sturdy wood for durability. Ensure the screws and brackets can support heavy garage items. Safety gear like gloves and goggles is also important.
How Do I Measure Space For Garage Shelving?
Measure the wall width and height where you plan to install shelves. Consider the depth based on storage needs. Leave enough clearance for easy access. Accurate measurements ensure your shelving fits well and maximizes garage space effectively.
Can I Build Garage Shelves Without Professional Tools?
Yes, basic tools like a drill, saw, level, and screwdriver are enough. Power tools make the job faster but are not mandatory. Simple hand tools can also help you build sturdy, functional shelves with proper planning.
How To Secure Shelving Units To Garage Walls Safely?
Use wall studs to anchor shelves securely. Locate studs with a stud finder. Use heavy-duty screws and brackets for strong support. Proper anchoring prevents shelves from tipping or collapsing under heavy loads.
Conclusion
Building a shelving unit for your garage helps keep things neat. It saves space and makes tools easy to find. Use simple tools and follow clear steps for best results. Take your time and measure carefully before cutting wood. Strong shelves hold heavy items safely and last longer.
Organizing your garage becomes easier with custom shelves. Try this project to improve your workspace today. A tidy garage feels good and works better. Simple changes can make a big difference.


