
Imagine having a special spot where every morning feels like a fresh start, and getting ready becomes your favorite part of the day. Building your own makeup vanity table can turn this dream into reality.
You’ll create a space that’s not just stylish but perfectly fits your needs and personality. Ready to discover how simple it is to build a vanity table that organizes your beauty essentials and boosts your confidence every time you sit down?
Let’s dive in and make your daily routine something you truly look forward to.
Choosing The Right Location
Finding the perfect spot for your makeup vanity table is important. The right location makes your space comfortable and easy to use.
Think about light, space, and how often you will use the vanity. These factors help you decide where to place it.
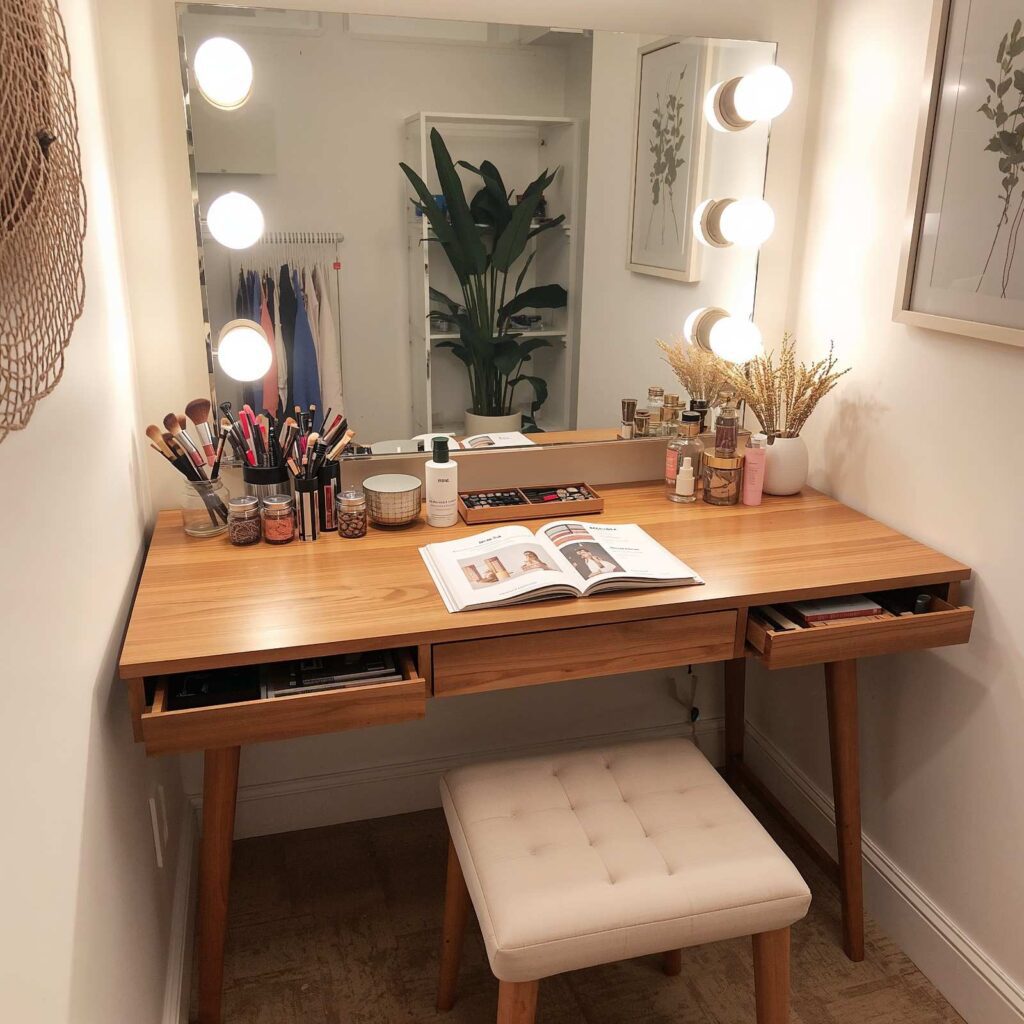
Lighting Options
Good lighting helps you see your makeup clearly. Natural light is the best choice if you can place your vanity near a window.
If natural light is not available, use soft white bulbs. Avoid harsh lights that create shadows on your face.
- Place vanity near a window for natural light
- Use soft white LED bulbs for even lighting
- Consider adding a lighted mirror for better visibility
- Avoid placing vanity in dark corners
Space Considerations
Choose a spot that has enough room for your vanity and chair. You need space to sit and move comfortably.
Think about storage space for your makeup and tools. A clutter-free area helps keep your vanity neat and usable.
- Allow enough room for a chair and leg space
- Keep the area clear of heavy foot traffic
- Check for nearby outlets for electric tools
- Choose a quiet, private space for relaxing

Credit: www.amazon.com
Selecting Materials And Tools
Building a makeup vanity table involves choosing the right materials and tools. This guide helps you make the best choices.
Learn about different wood types and essential tools required for crafting your vanity table.
Wood Types
The type of wood you select affects the durability and look of your table. Choose wisely based on your needs.
- Pine:Light, easy to work with, budget-friendly.
- Oak:Strong, durable, with a classic appearance.
- Maple:Hard, dense, ideal for a smooth finish.
- Walnut:Rich color, excellent for a premium look.
Essential Tools
Having the right tools makes building your vanity table easier and more efficient. Here are some tools you will need.
| Tool | Purpose |
| Measuring Tape | For accurate measurements |
| Saw | To cut wood to size |
| Drill | For making holes and assembling parts |
| Sandpaper | To smooth wood surfaces |
| Paintbrush | For applying finishes |
Step-by-step Assembly
Building a makeup vanity table can be a fun and rewarding project. It helps you create a personal space for your beauty routine.
This guide will walk you through the main steps to assemble your own vanity table. Follow each part carefully for best results.
Building The Frame
Start by gathering all materials like wood boards, screws, and tools. The frame is the base that holds the entire table.
Cut the wood pieces to size. Then join them to form the legs and tabletop support.
- Measure and cut the legs to equal length
- Attach horizontal supports between legs
- Secure the tabletop frame on top
- Use screws and wood glue for strong joints
- Check that the frame is level and stable
Adding Storage Features
Storage helps keep your makeup and tools organized. Add drawers, shelves, or compartments to your frame.
Plan the size and number of storage parts before attaching them. Make sure they fit well and open smoothly.
- Install drawers under the tabletop for small items
- Add shelves on the sides for larger products
- Use dividers inside drawers to separate items
- Attach knobs or handles for easy opening
- Check that all parts are secure and aligned
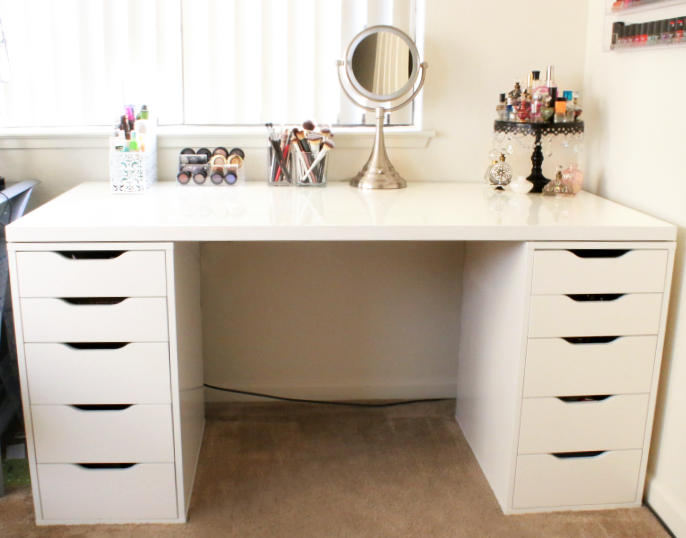
Credit: peekandponder.com
Personalizing Your Vanity
Building a makeup vanity table is a fun way to add style to your room. Personalizing it makes it truly yours. You can choose colors, decorations, and ways to keep your items tidy.
This guide will help you add your own touch to your vanity. Small details can make a big difference in how it looks and works.
Painting And Finishing Touches
Painting your vanity lets you pick colors that match your style. Use paint that works well on wood or the material you use. Choose a smooth finish for an elegant look or a matte finish for a soft feel.
Adding details like knobs, stickers, or small decorations makes your vanity unique. You can also add a mirror frame or lights to improve its look and function.
- Pick paint colors that match your room
- Use brushes or spray paint for smooth coats
- Add new handles or knobs to drawers
- Decorate with washi tape or decals
- Install LED lights around the mirror
Organizing Makeup And Accessories
Keeping your makeup and accessories organized helps you find what you need fast. Use trays, jars, and small boxes to separate items. This keeps your vanity neat and easy to clean.
Label containers or group items by type. This way, you save time and keep everything in its place. You can also add a small drawer organizer for brushes and tools.
- Use clear trays for lipsticks and eye shadows
- Store brushes in jars or cups
- Label boxes for different items
- Keep daily-use items in easy reach
- Add drawer dividers for small tools
Credit: thebeautyduty.com
Frequently Asked Questions
What Materials Do I Need To Build A Makeup Vanity Table?
You need wood, screws, nails, sandpaper, paint or stain, a mirror, and drawer handles. Choose durable wood like oak or pine. These materials ensure a sturdy and attractive vanity table.
How Do I Choose The Right Size For My Vanity Table?
Measure your available space carefully. Consider your storage needs and seating comfort. A compact vanity fits small rooms, while larger tables offer more storage and workspace.
What Lighting Is Best For A Makeup Vanity Table?
Natural light or LED lights with daylight bulbs work best. They provide bright, even lighting, crucial for accurate makeup application and reducing shadows on your face.
How Can I Organize Makeup On My Vanity Table?
Use drawer dividers, acrylic organizers, and trays. Group similar items together for easy access. This keeps your makeup neat and your workspace clutter-free.
Conclusion
Building a makeup vanity table can be simple and fun. Choose the right materials and tools first. Plan your design to fit your space well. Take your time while assembling each part. Add personal touches like mirrors and lights. A custom vanity makes your beauty routine easier.
Enjoy the process and the final look. Your new vanity will bring joy daily. Start today and create a space you love.


