
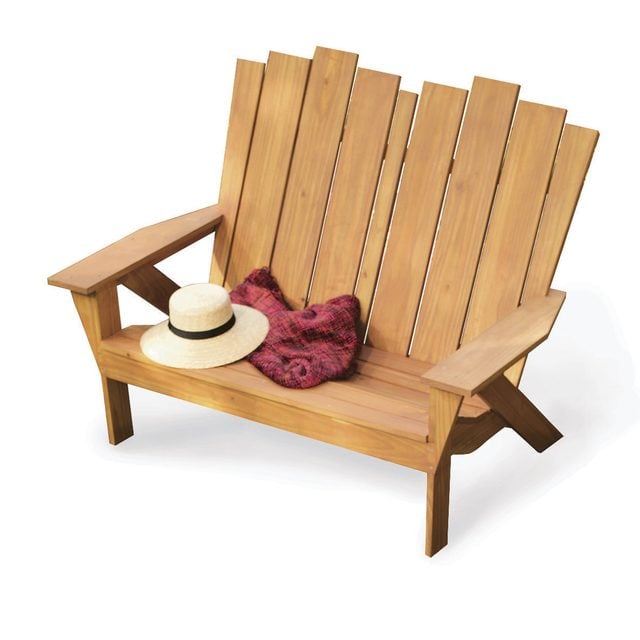
Imagine relaxing on your own handmade Adirondack chair, feeling the gentle breeze and soaking up the sun. Building one might seem tricky, but what if it could be simple and fun?
You don’t need to be a woodworking expert to create a beautiful, sturdy chair that’s perfect for your porch or garden. In this guide, you’ll discover easy steps and clear instructions to build your very own Adirondack chair. By the end, you’ll have a project that not only looks great but also gives you a real sense of pride.
Ready to get started? Let’s make your outdoor space more inviting with a chair you built yourself.
Credit: www.familyhandyman.com
Materials And Tools Needed
Building an easy Adirondack chair is a great project for beginners. You need the right materials and tools to make it simple and fun.
This list will help you gather everything before starting your chair build.
Wood Materials
Choose wood that is strong and weather-resistant. Cedar and pine are good choices for outdoor use.
- 1×4 inch cedar or pine boards (for seat and back slats)
- 1×6 inch cedar or pine boards (for armrests)
- 2×4 inch cedar or pine boards (for legs and frame)
- Wood screws, 1 1/4 inch and 2 1/2 inch
- Exterior wood glue (optional for extra strength)
Tools Needed
You will need basic woodworking tools. These tools help you cut, join, and finish the chair.
- Measuring tape
- Pencil for marking
- Circular saw or handsaw
- Drill with screwdriver bits
- Sandpaper or power sander
- Clamps to hold pieces while assembling
- Safety glasses and gloves
Finishing Supplies
After building, finishing your chair helps protect the wood and makes it look nice.
- Outdoor wood stain or paint
- Paintbrush or foam brush
- Clear outdoor sealant for extra protection
Preparing The Wood Pieces
Building an Adirondack chair starts with preparing the wood. Proper preparation ensures a sturdy and comfortable chair. Let’s explore the steps involved.
Selecting The Right Wood
Choose wood that is weather-resistant and durable. Cedar and teak are popular choices for outdoor furniture.
- Cedar is lightweight and resists decay
- Teak is strong and withstands outdoor conditions
- Pine is affordable and easy to work with
Cutting The Wood
Use a saw to cut the wood into the required pieces. Follow the chair design plans for accurate dimensions.
- Measure twice, cut once
- Use a circular saw for straight cuts
- A jigsaw is best for curved cuts
Sanding The Edges
Smooth the edges of the wood pieces with sandpaper. This prevents splinters and gives a polished look.
- Start with coarse sandpaper
- Finish with fine sandpaper for a smooth feel
- Ensure all edges are rounded
Drilling Pilot Holes
Drill pilot holes before assembling the chair. This prevents the wood from splitting during assembly.
- Use a drill bit smaller than the screw diameter
- Mark the hole positions clearly
- Ensure holes are straight and aligned
Assembling The Chair Frame
Building an Adirondack chair frame is the first step to a comfortable outdoor seat. This part requires careful measuring and fitting of wood pieces.
Follow the instructions below to put together the main structure securely and evenly.
Start by cutting all the wood pieces to the right size. Sand the edges to avoid splinters. Make sure each piece matches the chair design plan.
Joining The Seat And Back Supports
Attach the seat supports to the back supports using wood screws. Align them properly so the seat is level and the backrest leans at a comfortable angle.
- Place the back supports upright on a flat surface.
- Position the seat supports at the base, fitting them between the back supports.
- Drill pilot holes to prevent wood splitting.
- Secure the seat supports with screws on both sides.
Assembling The Legs And Armrests
Attach the legs to the frame first. Make sure the chair sits evenly on the ground. Then fix the armrests to the top of the legs and the back supports.
| Part | Attachment Method | Tip |
| Legs | Wood screws and glue | Check leg height before screwing |
| Armrests | Wood screws | Keep armrests level and straight |
Securing The Frame
Double-check all joints for tightness. Use clamps if needed to hold parts while screwing. This step ensures the chair frame is solid and safe to use.
Tip:Use waterproof wood glue on all joints for extra strength.

Credit: www.familyhandyman.com
Finishing Touches And Maintenance
After building your Adirondack chair, adding finishing touches will protect it. Proper maintenance keeps it strong and looking good.
Use simple methods to finish and care for your chair. This helps it last many years outdoors.
Sanding The Surface
Sanding smooths the wood and removes rough spots. Use fine-grit sandpaper for a soft finish.
Sand all surfaces evenly, including edges and corners. This prevents splinters and makes painting easier.
Applying Paint Or Sealant
Paint or sealant protects wood from water and sun damage. Choose a product made for outdoor wood.
- Use a brush to apply thin, even coats
- Let each coat dry before adding the next
- Cover all parts, including under the seat and legs
Reapply sealant every year to keep the chair safe from weather.
Tightening Screws And Bolts
Check screws and bolts regularly. Tighten any loose parts to keep the chair sturdy.
Loose screws can cause the chair to wobble or break over time. Use a screwdriver or wrench for adjustments.
Cleaning Your Adirondack Chair
Clean dirt and dust from the chair often. Use mild soap and water with a soft cloth or brush.
- Rinse with clean water after washing
- Dry the chair fully before use
- Avoid harsh chemicals that damage wood
Regular cleaning helps the finish last longer and keeps the chair looking fresh.
Storing The Chair In Bad Weather
Move the chair indoors or under cover during heavy rain or snow. This stops wood from swelling and cracking.
If you cannot store it inside, use a waterproof cover to protect the chair.

Credit: johnmalecki.com
Frequently Asked Questions
What Tools Are Needed To Build An Adirondack Chair?
To build an Adirondack chair, you need a saw, drill, screwdriver, measuring tape, clamps, and sandpaper. These basic tools help cut, assemble, and finish the chair smoothly and accurately.
How Long Does It Take To Build An Adirondack Chair?
Building an Adirondack chair typically takes 4 to 6 hours. This depends on your skill level and the complexity of the design you choose.
What Type Of Wood Is Best For Adirondack Chairs?
Cedar, pine, or redwood are ideal for Adirondack chairs. These woods resist weather, are easy to work with, and provide a beautiful finish.
Can Beginners Easily Build An Adirondack Chair?
Yes, beginners can build an Adirondack chair with clear instructions. Simple designs and proper tools make the project manageable and rewarding.
Conclusion
Building an easy Adirondack chair is fun and rewarding. You only need simple tools and some wood. Follow the steps carefully and take your time. Soon, you will have a comfortable chair for your porch or garden. Enjoy sitting outside, relaxing after a long day.
This project is perfect for beginners who want to try woodworking. Give it a try, and you might surprise yourself. A homemade Adirondack chair adds charm and comfort to any outdoor space. Simple, sturdy, and beautiful—just like you wanted.


