Looking for a smart way to save space in your nursery? Building a corner baby changing table might be just what you need.
It fits neatly into any room corner, giving you more space to move around while keeping all your baby’s essentials close at hand. Plus, making it yourself means you can customize the size, style, and storage exactly how you want.
In this guide, you’ll find simple steps and practical tips to create a sturdy, safe, and stylish changing table that suits your needs perfectly. Ready to get started? Let’s dive in!
Choosing The Right Materials
Building a corner baby changing table needs careful material choices. The materials should be safe, strong, and easy to clean.
Picking the right wood and tools helps make a sturdy and safe changing table for your baby.
Selecting Safe Wood Types
Choose wood that is non-toxic and smooth to protect your baby. Avoid woods that may cause allergies or have strong smells.
Hardwoods like maple and birch are good choices. They are strong and have a smooth finish. Pine is softer but still works well if sealed properly.
- Avoid treated woods with chemicals
- Use sanded wood to prevent splinters
- Pick wood with natural colors for easy finishing
- Check for wood that resists moisture
Essential Tools And Hardware
You need basic tools to build the table safely and neatly. Good hardware helps hold the table parts firmly together.
Make sure to have screws, brackets, and hinges that fit the wood thickness. Use non-toxic paint or finish for the surface.
- Power drill with drill bits
- Screwdriver set
- Measuring tape and pencil
- Sandpaper or electric sander
- Wood screws and corner brackets
- Non-toxic wood finish or paint

Credit: www.ana-white.com
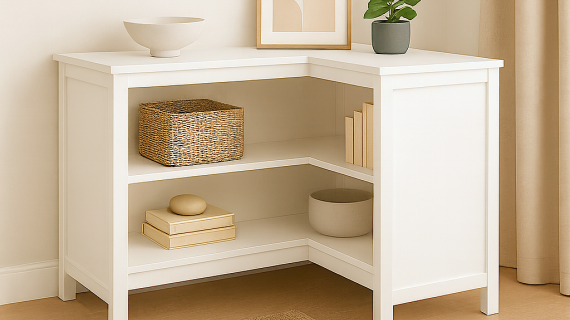
Designing Your Corner Table
Building a corner baby changing table can save space. It is also functional for small rooms.
The table should fit well in the corner. It should also be safe and convenient for diaper changes.
Measuring Your Space
Measure the corner where you will place the table. Accurate measurements help in planning the table size.
Consider the height of the table. It should be comfortable for you to use.
- Measure the width and depth of the corner
- Check the height from floor to the table top
- Leave space for movement around the table
Creating A Practical Layout
Plan a layout that includes storage for baby items. Shelves or drawers can be included below the table.
The top should have enough space for the baby and supplies. Safety rails are also important.
| Feature | Benefit |
| Shelves | Keep diapers and wipes handy |
| Drawers | Store clothes and blankets |
| Safety Rails | Prevent baby from rolling off |
Step-by-step Assembly
Building a corner baby changing table can save space and provide a safe spot for your baby. Follow these clear steps to make a sturdy and practical piece.
This guide breaks the process into three parts: cutting wood, building the frame and shelves, and finishing with safety checks.
Cutting And Preparing Wood
Start by selecting good quality wood like pine or oak. Measure carefully to fit your corner space. Sand all pieces smooth to avoid splinters.
- Measure your corner space accurately.
- Mark the wood pieces for the frame and shelves.
- Cut the wood using a saw along the marks.
- Sand each piece until smooth.
- Check that all pieces fit together properly.
Building The Frame And Shelves
Assemble the frame first using screws and wood glue. Attach shelves inside the frame for storage. Make sure everything is level and tight.
| Part | Dimensions (inches) | Quantity |
| Side Panels | 30 x 15 | 2 |
| Back Panel | 30 x 20 | 1 |
| Shelves | 28 x 14 | 2 |
| Base | 30 x 15 | 1 |
Finishing Touches And Safety Checks
Sand all edges again to ensure smoothness. Apply non-toxic paint or finish suitable for babies. Check stability and secure all screws tightly.
- Remove dust and debris from sanding.
- Use baby-safe finishes only.
- Test the table for wobbling.
- Make sure all screws are flush.
- Add soft padding on the top surface.
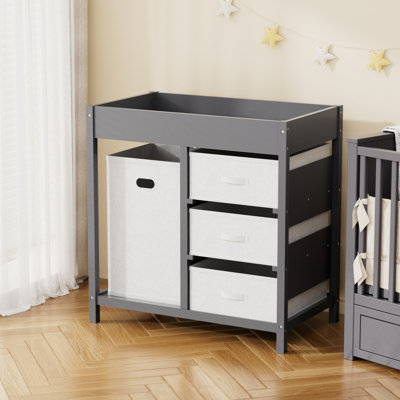
Credit: www.wayfair.com
Maintaining And Using The Table
Keeping your corner baby changing table clean and organized helps it last longer. Use it safely and keep all items within reach. This makes changing your baby easier and faster.
Regular care also protects your baby from germs and keeps the space tidy. Follow these tips to maintain and use your table well.
Cleaning Tips
Clean the table after each use to avoid stains and germs. Use gentle cleaners safe for babies. Wipe all surfaces, including edges and corners.
- Use a mild soap and warm water for daily cleaning
- Disinfect with baby-safe wipes once a week
- Dry the surface completely to prevent mold
- Wash any removable covers or pads regularly
- Check for damage or loose parts during cleaning
Maximizing Storage And Functionality
Use the corner space smartly to store all essentials. Keep diapers, wipes, creams, and clothes handy. Organize items by frequency of use.
| Storage Area | Suggested Items | Tip |
|---|---|---|
| Top Shelf | Changing pads, blankets | Keep clean and soft items here |
| Side Compartments | Diapers, wipes | Store frequently used items for quick access |
| Lower Shelves | Extra clothes, creams, toys | Use bins to keep items organized |

Credit: www.reddit.com
Frequently Asked Questions
What Materials Are Needed For A Corner Baby Changing Table?
You need plywood, screws, wood glue, sandpaper, paint, and corner brackets. Choose non-toxic paint for safety. Ensure materials are sturdy to support the baby’s weight securely.
How Do I Measure Space For A Corner Changing Table?
Measure the corner dimensions precisely, including width and depth. Allow extra space for baby’s movement. Ensure the table fits comfortably without blocking doorways or walkways.
What Safety Features Should A Corner Changing Table Have?
Include raised edges to prevent rolling off. Use smooth finishes to avoid splinters. Secure the table firmly to the wall to prevent tipping.
Can I Customize Storage On A Corner Baby Changing Table?
Yes, add shelves or drawers for diapers and wipes. Customize storage to keep essentials organized and within reach. Use baskets or bins for easy access.
Conclusion
Building a corner baby changing table saves space and adds style. You can create a safe, sturdy spot for diaper changes. Using basic tools and simple steps makes the project easy. Customize the table to fit your room and needs.
Enjoy having a handy, compact changing area nearby. This DIY project brings convenience and comfort together. Start planning today to make your baby’s space better.


