Have you ever wished for a vanity table that perfectly fits your style and space? Imagine having a beautiful, personalized spot where you can get ready each day, organized just the way you like.
Making your own vanity table isn’t as hard as you might think. In this guide, you’ll discover simple steps to create a stunning vanity that saves you money and matches your unique taste. Ready to turn your dream vanity into reality?
Let’s dive in!

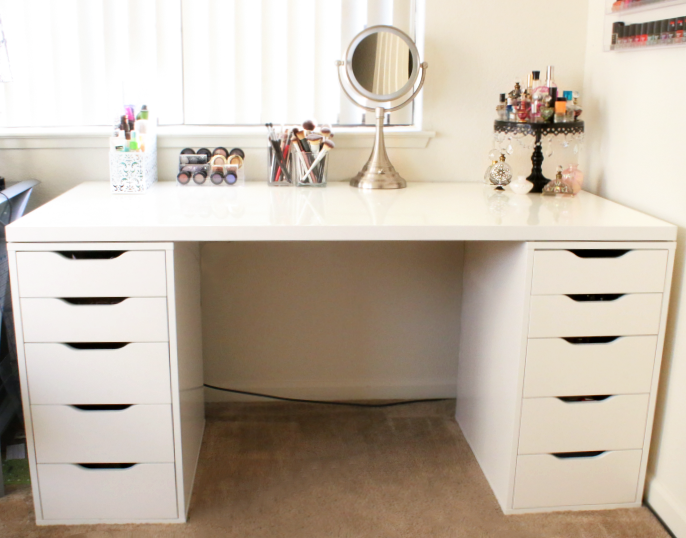
Credit: www.realtor.com
Choosing Materials
Making your own vanity table starts with selecting the right materials. The materials you choose will affect the table’s look and durability.
Focus on wood and hardware first. These parts create the base and details of your vanity table.
Selecting The Right Wood
Wood type decides how strong and beautiful your vanity table will be. Choose wood that fits your style and budget.
- Oak: Very strong and has a classic look.
- Pine: Affordable and easy to work with.
- Maple: Smooth grain and hard surface.
- Cherry: Rich color that darkens over time.
- Walnut: Dark wood with a luxurious feel.
Picking Hardware And Accessories
Hardware adds function and style to your vanity table. Choose pieces that match your wood and room decor.
| Hardware Type | Common Materials | Style Notes |
| Drawer Pulls | Metal, Wood, Ceramic | Choose simple or decorative designs |
| Hinges | Steel, Brass | Check strength and smooth operation |
| Mirror Mounts | Metal, Plastic | Secure and easy to adjust |
| Leg Caps | Rubber, Metal | Protect floors and add detail |
Designing Your Vanity
Creating your own vanity table can be a fun project. It adds a personal touch to your space. A well-designed vanity can also help organize your beauty products.
Start by considering the layout and materials. Think about how it will fit into your room’s design. This guide will help you with the planning and storage solutions.
Measuring And Planning
Before you start building, measure the space where your vanity will go. Accurate measurements ensure a perfect fit.
- Measure the width, height, and depth of the area.
- Consider the space needed for a chair or stool.
- Plan for electrical outlets if you use beauty tools.
Incorporating Storage Solutions
Good storage keeps your vanity tidy and organized. Choose solutions that fit your needs and style.
| Storage Option | Benefits |
| Drawers | Hide clutter, easy access |
| Shelves | Display items, adds style |
| Baskets | Portable, flexible use |
Assembly Process
Making your own vanity table is a fun project. It needs careful assembly to look great and last long.
This guide covers cutting parts and building the frame and drawers. Follow each step clearly.
Cutting And Preparing Parts
First, measure and cut all wood parts. Use good quality wood for a strong table.
- Cut the tabletop, legs, drawer fronts, sides, and back panels.
- Sand each piece to remove rough edges and splinters.
- Mark holes for screws and drawer slides clearly.
- Apply wood primer or paint if you want a finished look before assembly.
Building The Frame And Drawers
Start by assembling the frame. Attach legs to the tabletop securely with screws.
| Part | Material | Size (inches) | Notes |
| Tabletop | Wood board | 40 x 18 x 1 | Sand edges smooth |
| Legs | Wood | 28 x 2 x 2 | Attach firmly to tabletop |
| Drawer Front | Wood | 14 x 6 x 0.75 | Drill holes for handles |
| Drawer Sides | Wood | 14 x 6 x 0.5 | Use wood glue and nails |
| Drawer Back | Wood | 12 x 6 x 0.5 | Attach securely |
Build drawers by joining sides, back, and front. Fit drawer slides inside the frame.
- Attach drawer sides to the drawer front using wood glue and nails.
- Fix the drawer back to complete the box.
- Insert the drawer slides inside the frame and on the drawers.
- Test drawer movement and adjust if needed.
- Secure all screws tightly to avoid wobbling.

Credit: www.youtube.com
Finishing Touches
Finishing touches make your vanity table look complete and polished. These details add style and function to your project.
Paying attention to sanding, painting, mirrors, and lighting helps create a beautiful and useful vanity.
Sanding And Painting
Sanding smooths the surface and removes rough spots. It helps the paint stick better and look nice.
Use fine sandpaper and sand evenly. Clean dust before painting for a clean finish.
- Start with medium grit sandpaper
- Finish with fine grit for smoothness
- Wipe surface with a damp cloth
- Choose paint that suits wood or material
- Apply thin coats and let dry fully
Adding Mirrors And Lighting
A mirror is key for any vanity table. Pick one that fits your style and space.
Lighting helps you see clearly while using the vanity. Soft, bright lights work best.
- Use a mirror with a sturdy frame
- Attach mirror securely to the table or wall
- Choose LED lights for low heat and brightness
- Place lights around the mirror evenly
- Consider battery-powered or plug-in lights

Credit: vanitii.com
Frequently Asked Questions
How To Choose The Best Materials For A Vanity Table?
Select durable, lightweight wood like pine or MDF for easy handling. Use quality paint for a smooth finish. Choose materials that suit your room’s style and budget. Proper materials ensure longevity and aesthetic appeal.
What Tools Do I Need To Build A Vanity Table?
Basic tools include a saw, drill, screwdriver, measuring tape, and clamps. Sandpaper and paintbrushes are also essential. These tools help in cutting, assembling, and finishing your vanity table efficiently and accurately.
How Long Does It Take To Make A Vanity Table?
It typically takes 4 to 8 hours depending on skill and design complexity. Simple tables may require less time, while detailed designs take longer. Proper planning and preparation can reduce the build time.
Can I Add Storage To My Diy Vanity Table?
Yes, incorporate drawers, shelves, or organizers for makeup and accessories. Customize storage based on your needs and available space. Adding storage improves functionality and keeps your vanity neat.
Conclusion
Building your own vanity table can be a fun and rewarding project. It lets you create a space that fits your style and needs perfectly. With some basic tools and materials, you can design a piece that looks great and works well.
Remember to take your time and enjoy the process. Soon, you will have a beautiful vanity table made by your own hands. Give yourself credit for this creative and practical achievement. Ready to start? Your perfect vanity awaits.


