
Imagine having everything you need right at your fingertips while you relax in your favorite armchair. No more getting up to find your remote, phone, or a snack.
With an armchair caddy, you can keep all your essentials organized and within easy reach. In this post, you’ll learn simple, step-by-step instructions to make your own armchair caddy. It’s easy, practical, and perfect for adding convenience to your downtime.
Keep reading, and you’ll discover how a small DIY project can make your relaxation time even better.
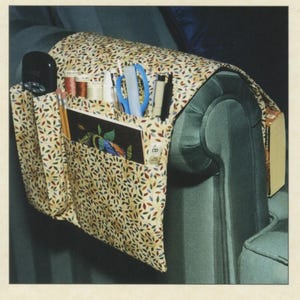
Credit: www.etsy.com
Materials Needed
Making an armchair caddy is simple and fun. You only need a few materials to get started.
Gather everything before you begin to keep your work smooth and easy.
Fabric
Choose a durable fabric for your armchair caddy. Cotton or canvas works well.
Pick a pattern or color that matches your room or style.
Sewing Thread
Use strong thread that matches or contrasts with your fabric. Polyester thread is a good choice.
Make sure the thread color blends well to keep your caddy looking neat.
Scissors
Sharp fabric scissors help you cut clean edges. Avoid using dull scissors.
Keep your scissors only for fabric to keep them sharp longer.
Measuring Tape Or Ruler
Use a measuring tape or ruler to measure your fabric pieces accurately.
Accurate measurements help your caddy fit well on your armchair.
Pins Or Clips
Pins or clips hold fabric pieces together while sewing. They keep your work neat.
Use pins carefully to avoid leaving holes in the fabric.
Sewing Machine Or Needle
A sewing machine speeds up the process, but hand sewing with a needle works too.
Choose a needle size that fits your fabric thickness.
Optional: Velcro Or Elastic Band
Velcro or elastic bands help attach the caddy securely to the armchair.
These materials make the caddy easy to remove and wash.
Cutting And Preparing Fabric
Cutting and preparing fabric is the first step to make an armchair caddy. You need clean, smooth fabric pieces for the best results.
Careful measuring and cutting will help your caddy fit well and look neat on your armchair.
Choosing The Right Fabric
Pick a fabric that is strong and easy to clean. Cotton canvas and denim work well. Avoid thin or stretchy fabric.
Measuring And Marking Fabric
Measure the armchair arm’s width and length to know how big the caddy should be. Use a fabric marker or chalk to mark these sizes on the fabric.
- Measure the width of the armchair arm.
- Measure the length from top to where you want the caddy to hang.
- Add 1 inch to each side for seam allowance.
- Mark these measurements on the fabric clearly.
Cutting Fabric Pieces
Use sharp fabric scissors to cut along the marked lines. Cut slowly to keep edges straight and clean.
| Fabric Piece | Size | Notes |
| Main Pocket | 12 inches wide by 20 inches long | Includes seam allowance |
| Side Pocket | 6 inches wide by 10 inches long | Optional small pocket |
| Backing Piece | 14 inches wide by 22 inches long | For lining the caddy |
Preparing Fabric Edges
Finish fabric edges to stop fraying. You can use a zigzag stitch on a sewing machine or fabric glue on raw edges.
Here is a simple HTML snippet to help you mark fabric:
const canvas = document.getElementById('fabricCanvas'); const ctx = canvas.getContext('2d'); ctx.strokeStyle = '0000FF'; ctx.lineWidth = 2; ctx.strokeRect(20, 20, 360, 160); ctx.font = '16px Arial'; ctx.fillText('Cut here', 180, 15); Sewing The Caddy
Sewing the armchair caddy is a fun and simple project. You need basic sewing skills and tools.
This guide shows how to stitch the pieces together to make a useful caddy for your armchair.
Prepare Your Fabric Pieces
Cut the fabric according to your pattern. Make sure you have all the pieces ready.
Iron the fabric to remove wrinkles. This helps to sew smooth and even seams.
Pin The Fabric Pieces Together
Use pins to hold the fabric pieces in place. This stops the fabric from shifting while sewing.
Pin the main pocket pieces first. Then pin the outer edges and straps.
Sew The Pockets
Start sewing the pocket pieces along the edges. Use a straight stitch for strong seams.
Leave the top of the pockets open so you can store items easily.
- Sew side seams
- Sew bottom seams
- Reinforce corners with backstitch
Attach The Outer Panels
Sew the front and back panels of the caddy together. Align edges carefully before sewing.
Use pins or clips to keep the fabric steady. Sew around three sides, leaving the top open.
Sew The Straps
Fold the strap fabric in half lengthwise. Sew along the edge to make a strong strap.
Turn the strap inside out to hide the seams. Press it flat with an iron for neatness.
Attach The Straps To The Caddy
Pin the straps to the top corners of the caddy. Make sure they are even on both sides.
Sew the straps securely to the caddy. Use extra stitches for strength and durability.
Finish The Edges
Fold the top edge of the caddy inward. Sew a hem to give a clean finish.
This step prevents fabric from fraying and makes the caddy look neat.

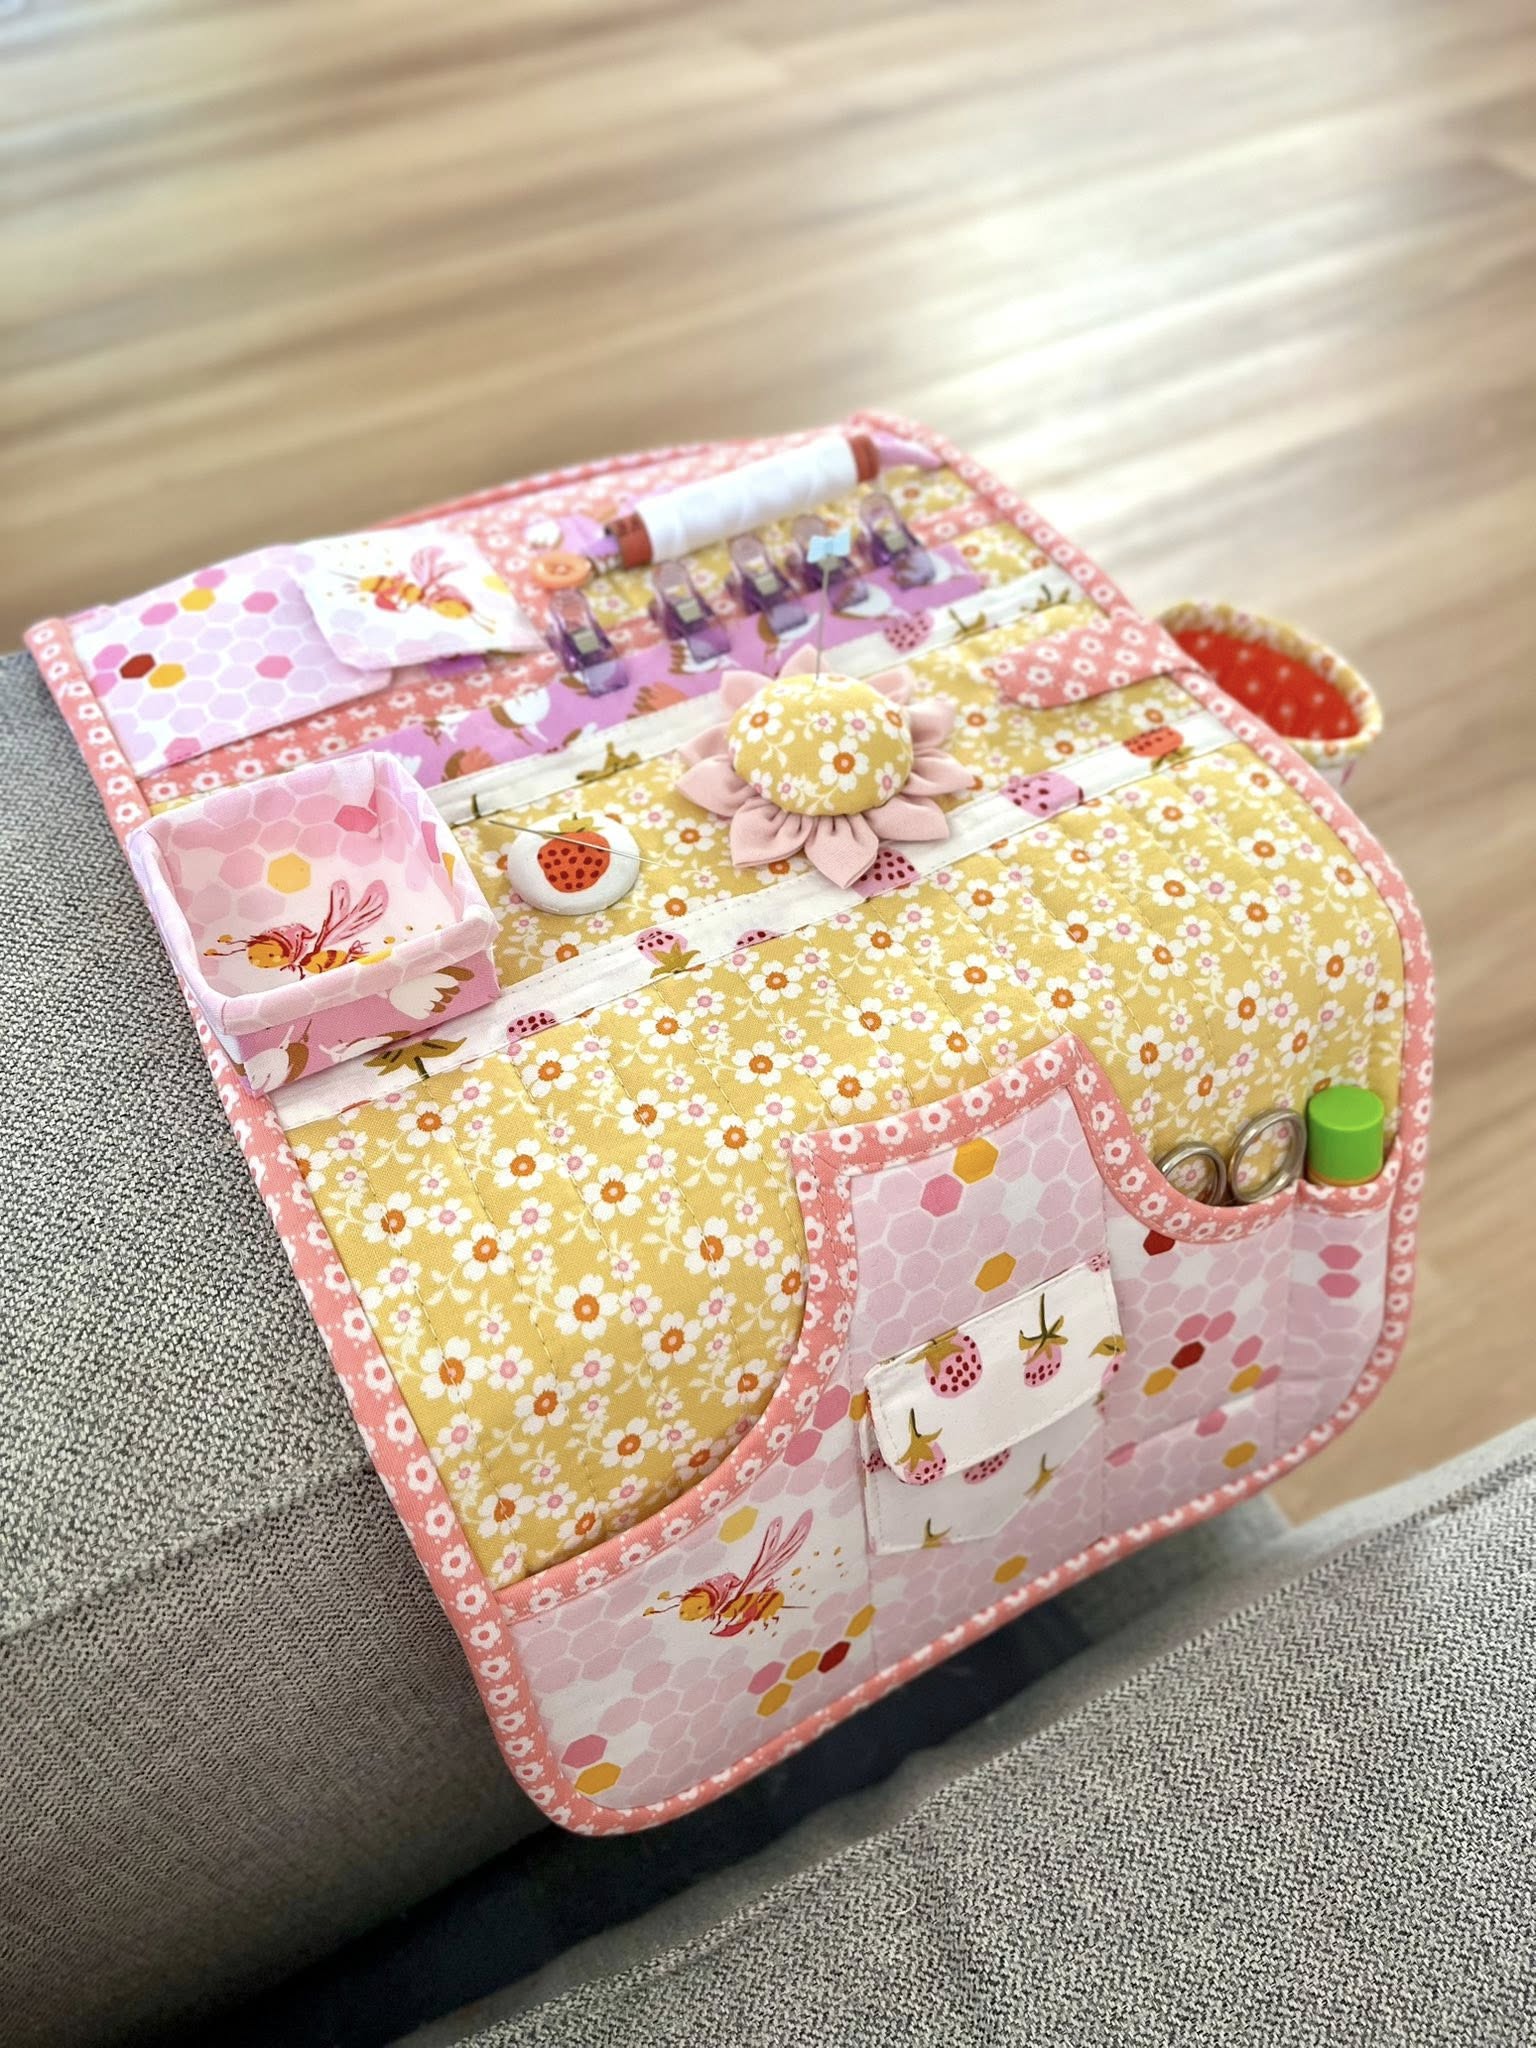
Credit: www.amazon.ca
Attaching The Caddy To The Armchair
Attaching an armchair caddy is easy and keeps your items close. This guide helps you fix it securely.
Follow simple steps to attach the caddy without damaging your chair. Use common tools and materials.
Positioning The Caddy
Place the caddy on the armrest where it fits comfortably. Check if it blocks any chair controls.
Make sure the pockets are easy to reach while sitting. Adjust the caddy’s angle for comfort.
Securing With Straps Or Velcro
Most caddies come with straps or Velcro to hold them in place. Wrap straps tightly around the armrest.
- Use the Velcro strips to stick the caddy firmly.
- Double-check the tightness of straps to prevent slipping.
- Choose straps that do not scratch the armchair material.
- Adjust Velcro position for a snug fit.
Using Clips Or Hooks
Clips or hooks add extra security to your caddy. Attach clips to the armrest frame if available.
| Clip Type | Best For | Notes |
|---|---|---|
| Plastic Clips | Lightweight caddies | May not hold heavy items |
| Metal Hooks | Heavy-duty caddies | Check for rust resistance |
| Spring Clips | Easy to attach and remove | Use on sturdy armrests |
Final Adjustments And Checks
After attaching, test the caddy by placing items inside. Make sure it does not move or slide.
- Check all straps and clips for tightness.
- Adjust the position for easy access.
- Ensure the caddy does not damage the chair fabric.
- Remove the caddy carefully to avoid pulling on the armrest.
Credit: www.arabesque-scissors.com
Frequently Asked Questions
What Materials Do I Need To Make An Armchair Caddy?
You need fabric, scissors, sewing machine, thread, measuring tape, and Velcro or elastic bands. Choose durable fabric for longevity. These materials ensure a sturdy and functional armchair caddy for holding remotes and magazines.
How Long Does It Take To Make An Armchair Caddy?
Making an armchair caddy typically takes 1 to 2 hours. Time depends on your sewing skills and design complexity. It’s a quick, beginner-friendly project that adds convenience and style to your armchair.
Can I Customize The Size Of The Armchair Caddy?
Yes, you can easily customize the size. Measure your armchair’s arm width and pocket depth before cutting fabric. Adjust dimensions to fit your specific needs for a perfect, personalized caddy.
Is Sewing Experience Required To Make An Armchair Caddy?
Basic sewing skills are helpful but not mandatory. Simple hand stitching or no-sew methods can work. Clear instructions and easy patterns make this project accessible for beginners.
Conclusion
Making an armchair caddy is simple and useful. It helps keep your space tidy and items close. You can use fabric scraps and basic tools to create one. Customize the size and pockets to fit your needs. This small project adds convenience to your daily life.
Try making your own caddy for a neat and organized armchair. Enjoy the ease it brings to your relaxation time.


