
Are you tired of tripping over shoes cluttering your entryway? Imagine having a dedicated space where you can neatly organize your footwear while also having a comfortable spot to sit down.
Building a shoe rack bench can transform your home, adding both functionality and style to your space. You don’t need to be a DIY expert to create this practical piece of furniture. In this guide, you’ll discover simple steps to craft a shoe rack bench that meets your needs and matches your decor.
Get ready to enhance your home’s organization and add a touch of personal flair. Keep reading to find out how you can tackle this rewarding project and enjoy a tidier, more welcoming home.

Credit: www.etsy.com
Choose The Right Materials
Choosing the right woodmakes your shoe rack bench strong and good-looking. Pine is easy to work with and affordable. Oak is very strong and lasts long but costs more. Birch is smooth and looks nice with paint. Avoid soft woods that can get damaged fast.
Fasteners and toolshelp you build the bench easily. Use wood screws that do not rust. Nails can be used but screws hold better. Pick a drill with bits that fit your screws. Sandpaper smooths rough edges. A saw cuts the wood to size. A screwdriver or drill driver speeds up work.
Step-by-step Assembly
Measure the space where the shoe rack bench will go. Mark wood pieces carefully for cutting. Use a saw to cut the wood to the right size. Keep measurements exact for a good fit.
Join the wood pieces to build the frame. Use screws or nails to hold pieces tight. Check that the frame is square and steady before moving on.
- Place shelves evenly inside the frame.
- Attach shelves securely with screws or brackets.
- Add a flat, strong top for seating.
- Sand edges to make them smooth and safe.
Finishing Touches
Smooth sanding and a fresh coat of paint make the shoe rack bench look neat and ready. Adding cushions or decorative knobs gives a nice, personal touch. These small details help the bench fit well in any room.
Sanding And Painting
Start by sanding the entire bench to smooth rough edges. Use medium-grit sandpaper first, then fine-grit for a soft finish. Remove dust with a clean cloth before painting. Choose paint that suits your room style. Apply thin, even coats to avoid drips. Let each coat dry well before adding the next. This makes the bench look neat and lasts longer.
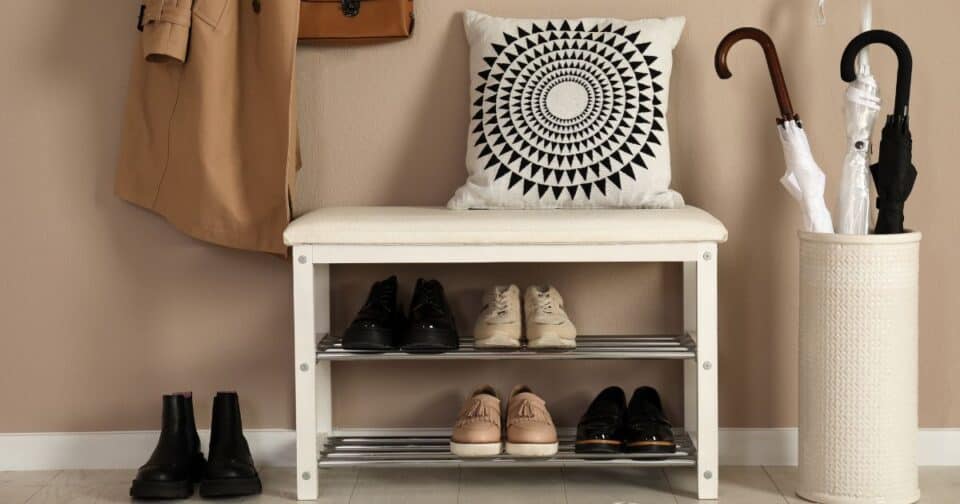
Adding Cushions And Accessories
Place a soft cushion on top for comfort. Pick cushions with colors matching your decor. Add hooks or small baskets on the sides for extra storage. These make the bench more useful and tidy. Accessories can include shoehorns or small mats to keep shoes clean.
Credit: www.drewandjonathan.com

Credit: crystelmontenegrohome.com
Frequently Asked Questions
What Materials Do I Need To Build A Shoe Rack Bench?
You need wood boards, screws, wood glue, sandpaper, paint or stain, and hinges. Optional items include cushions and brackets for extra support.
How Long Does It Take To Build A Shoe Rack Bench?
Building a shoe rack bench typically takes 3 to 5 hours. This depends on your experience and design complexity.
Can I Customize The Shoe Rack Bench Size?
Yes, you can customize the size to fit your space and shoe collection. Measure your area before starting.
What Tools Are Required For This Woodworking Project?
Essential tools include a saw, drill, screwdriver, measuring tape, and sander. Safety gear like gloves and goggles is recommended.
Conclusion
Building a shoe rack bench is a smart way to save space. It keeps shoes organized and adds seating. You only need a few tools and simple steps. Choose the right materials for strength and style. Take your time to measure and assemble carefully.
This project suits beginners and helps improve your home. Enjoy a neat entryway and a useful bench. Try it yourself and see the difference it makes.


