
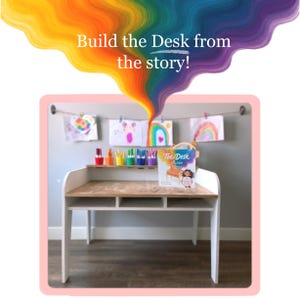
Are you looking for a fun and practical project that will make your child’s study time more enjoyable? Building a kids desk is easier than you might think, and it gives you the chance to create something perfect for your child’s needs.
Imagine a desk that fits just right, sparks creativity, and becomes their favorite spot to learn and play. In this guide, you’ll discover simple steps and helpful tips to build a sturdy, stylish kids desk that lasts. Ready to create a special space your child will love?
Let’s get started!

Credit: www.youtube.com
Choosing The Right Materials
Building a kids desk needs careful choice of materials. The desk should be safe and strong for daily use.
Picking the right wood and tools helps create a durable and child-friendly desk. This guide covers key points.
Selecting Safe And Durable Wood
Choose wood that is free of harmful chemicals and sturdy enough for kids. Avoid wood that splinters easily or smells strong.
- Use hardwoods like maple, oak, or birch for strength.
- Softwoods like pine are lighter but need sealing to prevent dents.
- Check for smooth surfaces to avoid splinters.
- Pick untreated or non-toxic finished wood for safety.
- Avoid plywood with harmful glues or chemicals.
Essential Tools And Supplies
Having the right tools makes building easier and safer. Gather these supplies before starting.
| Tool or Supply | Purpose |
| Measuring Tape | Measure wood pieces accurately |
| Hand Saw or Circular Saw | Cut wood to size |
| Sandpaper | Smooth edges and surfaces |
| Wood Glue | Join pieces firmly |
| Screws and Screwdriver | Secure the parts together |
| Non-toxic Paint or Sealant | Protect wood and ensure safety |
Designing The Desk
Creating a desk for kids can be a fun project. It should be comfortable and functional for their needs.
Consider the child’s height and how they will use the desk. Design with storage and space in mind.
Measuring For Comfort And Space
Measure the height of the child to ensure comfort. The desk should allow them to sit with their feet flat on the ground.
Consider the space available in the room. The desk should fit comfortably without crowding other furniture.
- Measure from the floor to the child’s waist for desk height.
- Ensure enough space for a chair to slide in and out easily.
- Check if the desk fits in the intended room area.
Incorporating Storage Options
Storage is key for a kid’s desk. It helps keep their work area tidy and organized.
Add drawers or shelves for books, art supplies, or toys. This encourages kids to keep their space clean.
- Include drawers for pens and paper.
- Install shelves for books and decorations.
- Consider a pegboard for hanging items.
Step-by-step Assembly
Building a kids desk is a fun and rewarding project. This guide will help you assemble it step-by-step.
Follow these clear instructions to make sure each part fits well and is strong.
Cutting And Preparing Pieces
Start by measuring and cutting the wood pieces carefully. Use a saw to cut the desk parts to the right size.
Sand all edges and surfaces to make them smooth. This helps prevent splinters and makes the desk look nice.
- Measure twice to cut once
- Cut the desktop, legs, and supports
- Sand all cut edges for safety
- Organize pieces by size and shape
Joining And Securing Components
Attach the legs to the desktop using screws and wood glue. Make sure each leg is straight and secure.
Use clamps to hold parts together while the glue dries. Check for any loose connections before finishing.
- Apply wood glue on joining surfaces
- Use screws to strengthen joints
- Clamp pieces tightly and let dry
- Check stability before use

Credit: www.erynwhalenonline.com
Finishing Touches
Finishing touches make your kids desk safe and nice to use. They also help the desk last longer.
Focus on sanding and painting carefully. Add personal details to make the desk special.
Sanding And Painting
Sanding smooths the wood and removes rough spots. This step stops splinters and makes painting easier.
Use fine sandpaper and sand all parts evenly. Wipe dust off before painting.
- Start with medium grit sandpaper (120-150 grit)
- Finish with fine grit sandpaper (220 grit)
- Remove dust with a dry cloth or tack cloth
- Use non-toxic paint safe for children
- Apply thin, even coats of paint or sealant
- Let each coat dry well before adding another
Adding Personalization
Make the desk unique by adding names, favorite colors, or fun designs. Personal touches make kids happy.
Use stickers, stencils, or hand-paint simple shapes. You can also add small storage or hooks for supplies.
- Paint the child’s name on the desk
- Add colorful patterns or shapes
- Use safe stickers or decals
- Attach small baskets or holders
- Choose themes like animals or space
- Keep decorations simple and durable
Credit: www.etsy.com
Frequently Asked Questions
What Materials Are Best For Building A Kids Desk?
Wood is ideal for building kids desks due to durability and ease of customization. Plywood and MDF are budget-friendly options. Avoid heavy materials to ensure safety and mobility. Use non-toxic paint or finishes to keep the desk child-friendly and safe.
How Do I Design A Kids Desk For Small Spaces?
Focus on compact, multi-functional designs for small spaces. Include storage options like drawers or shelves to save room. Choose foldable or wall-mounted desks to maximize floor area. Prioritize ergonomic size tailored to the child’s height and needs.
What Tools Are Needed To Build A Kids Desk?
Basic tools include a saw, drill, screwdriver, measuring tape, and sandpaper. Clamps and a level help ensure stability and accuracy. Safety gear like goggles and gloves is essential for protection during construction.
How Can I Make A Kids Desk Ergonomic?
Ensure the desk height matches the child’s sitting height. Use adjustable chairs for proper posture support. Include rounded edges to prevent injuries. Provide enough legroom and a spacious surface for comfortable use.
Conclusion
Building a kids desk is a fun and useful project. It helps create a special space for learning and play. You can choose materials that are safe and easy to handle. Simple tools and clear steps make the process smooth.
Personalize the desk to fit your child’s needs and style. This desk will grow with your child and support their daily tasks. Enjoy the time spent building and the joy it brings. A handmade desk adds warmth and care to any room.
Start small, stay patient, and watch your project come alive.


