Are you tired of a cluttered closet where finding your favorite outfit feels like a daily challenge? Imagine opening your closet to see everything neatly organized, easy to reach, and perfectly arranged to fit your lifestyle.
Building your own closet storage system can turn that dream into reality. In this guide, you’ll discover simple steps to create a custom solution that maximizes space and keeps your belongings tidy. Keep reading, and you’ll learn how to transform your closet into an organized haven that saves you time and stress every day.
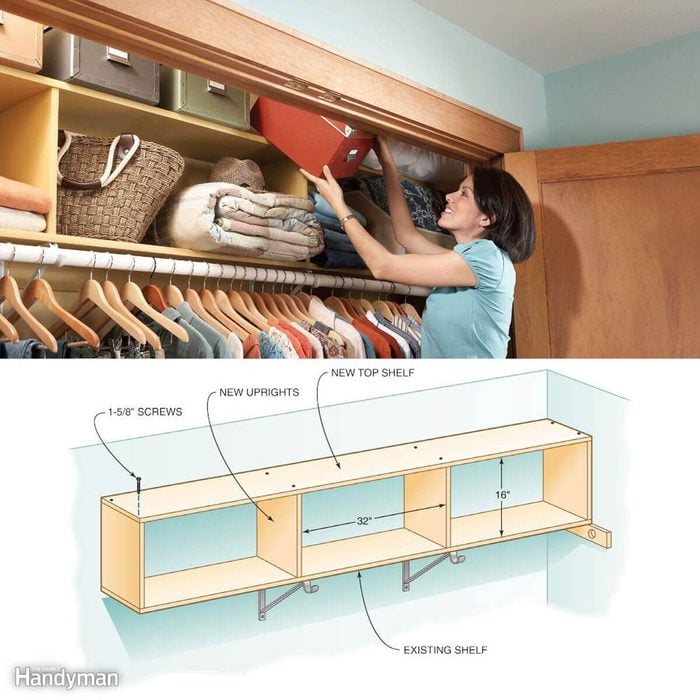
Credit: www.familyhandyman.com
Planning Your Closet Layout
Building a closet storage system starts with good planning. A clear plan helps you use space wisely.
Take time to think about your needs and how much space you have. This makes your closet organized and useful.
Assessing Space And Needs
Look at your closet and decide what you want to store. Clothes, shoes, accessories, or other items need different spaces.
Think about how you use your closet daily. This helps you choose the right design and storage options.
- Check what items you have now
- Decide what items you want to add
- Consider how often you use each item
- Plan for future storage needs
Measuring Dimensions
Measure your closet carefully. Write down the height, width, and depth of the space.
Measure doors, windows, and any obstacles inside the closet. This information helps avoid mistakes.
- Measure wall to wall width
- Measure floor to ceiling height
- Measure depth from front to back
- Note location of doors and vents
Choosing Storage Types
Select storage types that fit your items and space. Use shelves, rods, drawers, or baskets as needed.
Mix different storage styles to keep your closet neat. Think about easy access and visibility.
- Use hanging rods for clothes
- Add shelves for folded items
- Include drawers for small items
- Use baskets for accessories
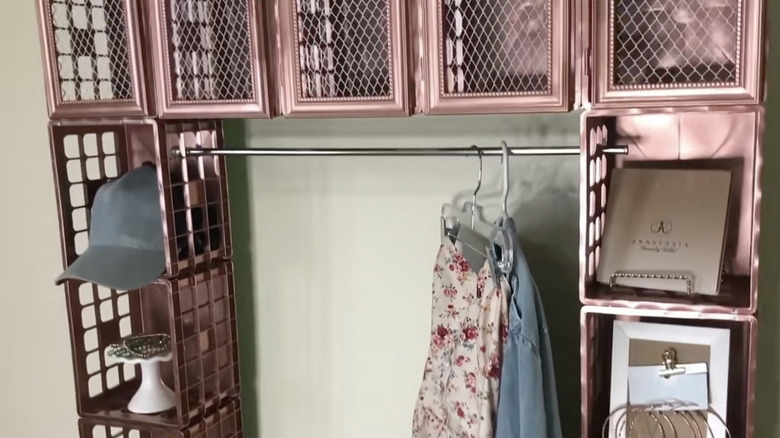
Credit: www.housedigest.com
Selecting Materials And Tools
Building a closet storage system starts with choosing the right materials and tools. This guide will help you make informed decisions to ensure durability and functionality.
Understanding the types of shelving, hardware essentials, and tools required will set the foundation for a successful project.
Types Of Shelving
Different shelving types offer various benefits. Choose based on your storage needs and the weight of items.
- Wire Shelving: Ideal for lightweight items and ventilation.
- Wood Shelving: Offers strength and aesthetic appeal for heavier items.
- Adjustable Shelving: Provides flexibility to change shelf heights as needed.
Hardware Essentials
Proper hardware ensures your closet system’s stability and ease of use. Select hardware based on the shelving type.
| Hardware Type | Purpose |
| Brackets | Supports shelves |
| Screws | Secures components |
| Anchors | Reinforces heavy loads |
Tools Required
Having the right tools will make the installation process smoother and more efficient. Ensure you have these tools on hand before you start.
- Drill: For making holes and securing screws.
- Level: Ensures shelves are straight.
- Measuring Tape: For accurate measurements.
- Screwdriver: For tightening screws.
- Saw: To cut shelving to size, if needed.
Step-by-step Installation
Building a closet storage system helps keep your space tidy. This guide walks you through each step to install it yourself.
Follow the instructions carefully for a neat and functional closet. You will learn how to prepare the space, add shelves and rods, and include drawers and accessories.
Preparing The Closet
Start by clearing out your closet completely. Remove old shelves, rods, and any items inside to make space for the new system.
- Measure the width, height, and depth of the closet.
- Check the walls for studs to secure shelves and rods.
- Plan the layout based on the items you want to store.
- Gather all tools and materials needed for installation.
Installing Shelves And Rods
Mark the locations on the wall for shelves and rods. Use a level to keep everything straight and even.
| Item | Height from Floor (inches) | Notes |
| Top Shelf | 72 | Store boxes or less-used items |
| Clothes Rod | 48 | For hanging shirts and jackets |
| Lower Shelf | 24 | For shoes or folded clothes |
Attach brackets firmly into studs. Then place the shelves on the brackets and secure them. Finally, install the rods between the supports.
Adding Drawers And Accessories
Add drawers and accessories to increase storage options. Drawers help organize small items and keep the closet neat.
- Choose drawer sizes that fit your closet space.
- Install handles or knobs for easy opening.
- Add hooks or baskets for extra storage.
- Place accessories within easy reach.
Maximizing Organization And Maintenance
Building a closet storage system helps keep your space neat and tidy. It saves time when you find clothes and accessories quickly.
Good organization makes your closet easier to maintain. A clean closet also helps protect your clothes and accessories.
Organizing Clothes And Accessories
Sort your clothes by type and use. Hang dresses and shirts. Fold sweaters and pants to save space.
Keep accessories like belts, scarves, and jewelry in separate areas. This keeps small items from getting lost.
- Group clothes by season or style
- Use hooks for bags and belts
- Store shoes on racks or shelves
- Use drawer dividers for small accessories
Using Storage Bins And Labels
Storage bins keep your items dust-free and organized. Clear bins let you see what is inside without opening them.
Labels help you find things quickly. They make it easy to put items back in the right place after use.
- Choose bins that fit your shelves or closet space
- Label bins by category like “Winter Wear” or “Accessories”
- Use matching labels for a neat look
- Stack bins safely to save space
Maintaining Your Closet System
Regular cleaning keeps your closet fresh and organized. Remove items you no longer use to free up space.
Check your system often. Fix any broken shelves or bins. Keep labels clear and readable.
- Clean shelves and bins every few months
- Donate or recycle clothes you do not wear
- Replace worn hangers and storage tools
- Update labels if you change storage categories
:max_bytes(150000):strip_icc()/spr-closetmaid-suitesymphony-closet-system-art-silverio-17-d691178a88004c30bf686b22d61c6202.jpeg)
Credit: www.thespruce.com
Frequently Asked Questions
What Materials Are Best For Closet Storage Systems?
Wood and metal are popular for durability and aesthetics. Wood offers a warm, classic look. Metal provides strength and modern appeal. Choose materials based on your budget and room style. Combining both can enhance functionality and design.
How Do I Measure My Closet For A Storage System?
Measure the width, height, and depth of your closet space. Note any obstacles like doors or vents. Accurate measurements ensure a perfect fit for shelves and rods. Double-check dimensions before purchasing components to avoid errors.
Can I Install A Closet Storage System Myself?
Yes, many closet systems are designed for DIY installation. Basic tools like a drill and level are usually sufficient. Follow instructions carefully to ensure stability and safety. DIY saves money and allows customization to your needs.
How Much Does A Closet Storage System Typically Cost?
Costs vary from $100 for basic kits to over $1,000 for custom designs. Material choice, size, and features affect price. Budget-friendly options include adjustable wire shelving. High-end systems offer solid wood and integrated lighting.
Conclusion
Building a closet storage system saves space and keeps things tidy. Start with a clear plan and measure your space carefully. Choose shelves, rods, and bins that fit your needs. Organize items by type to find them quickly. Regularly clean and adjust your system for best results.
A well-made closet system makes daily routines easier. It helps you enjoy a neat and clutter-free home. Take small steps, and you will see big changes. Simple tools and patience bring great rewards. Your closet can become a smart, useful space.


