
Are you looking to add a touch of charm and functionality to your home? Imagine turning an old headboard into a beautiful, custom bench that not only enhances your space but also tells a unique story.
Building a headboard bench might seem like a daunting task, but it’s easier than you think. With some basic tools and a bit of creativity, you can create a stunning piece of furniture that will impress your guests and become a cherished part of your décor.
This step-by-step guide will walk you through the process, ensuring you have fun and achieve a result you’ll be proud of. Ready to transform your space and unleash your inner DIY enthusiast? Let’s get started!
Choosing Materials And Tools
Choosing the right materials and tools sets the foundation for a successful headboard bench project. Your selection affects durability, appearance, and ease of assembly. Let’s break down what you need to make smart choices before you start building.
Selecting The Right Wood
Wood choice impacts both strength and style. Pine is affordable and easy to work with, making it great for beginners. If you want a more polished look, hardwoods like oak or maple offer durability and beautiful grain patterns.
Consider the location of your bench. Will it face heavy use or occasional sitting? For high-traffic areas, opt for sturdy wood that resists dents. Also, think about the finish—some woods take paint better, while others look best with natural stains.
Essential Tools Needed
Having the right tools can save frustration and improve your results. At minimum, gather a saw (circular or miter), a drill, screws, sandpaper, and wood glue. A level and measuring tape ensure your bench stays straight and balanced.
Power tools speed up the work, but hand tools are fine if you prefer a slower pace. Don’t forget safety gear—goggles and gloves protect you from dust and splinters. What tools do you already own that could simplify this build?
Preparing Your Workspace
Set up a clean, flat surface with enough room to move around. Good lighting helps you see details and avoid mistakes. Organize your tools nearby so you don’t waste time searching for them mid-project.
Think about ventilation, especially if you plan to paint or stain your bench. Cover your work area with a drop cloth to catch sawdust and spills. A tidy workspace keeps you focused and speeds up the building process.

Credit: athomewithashley.com
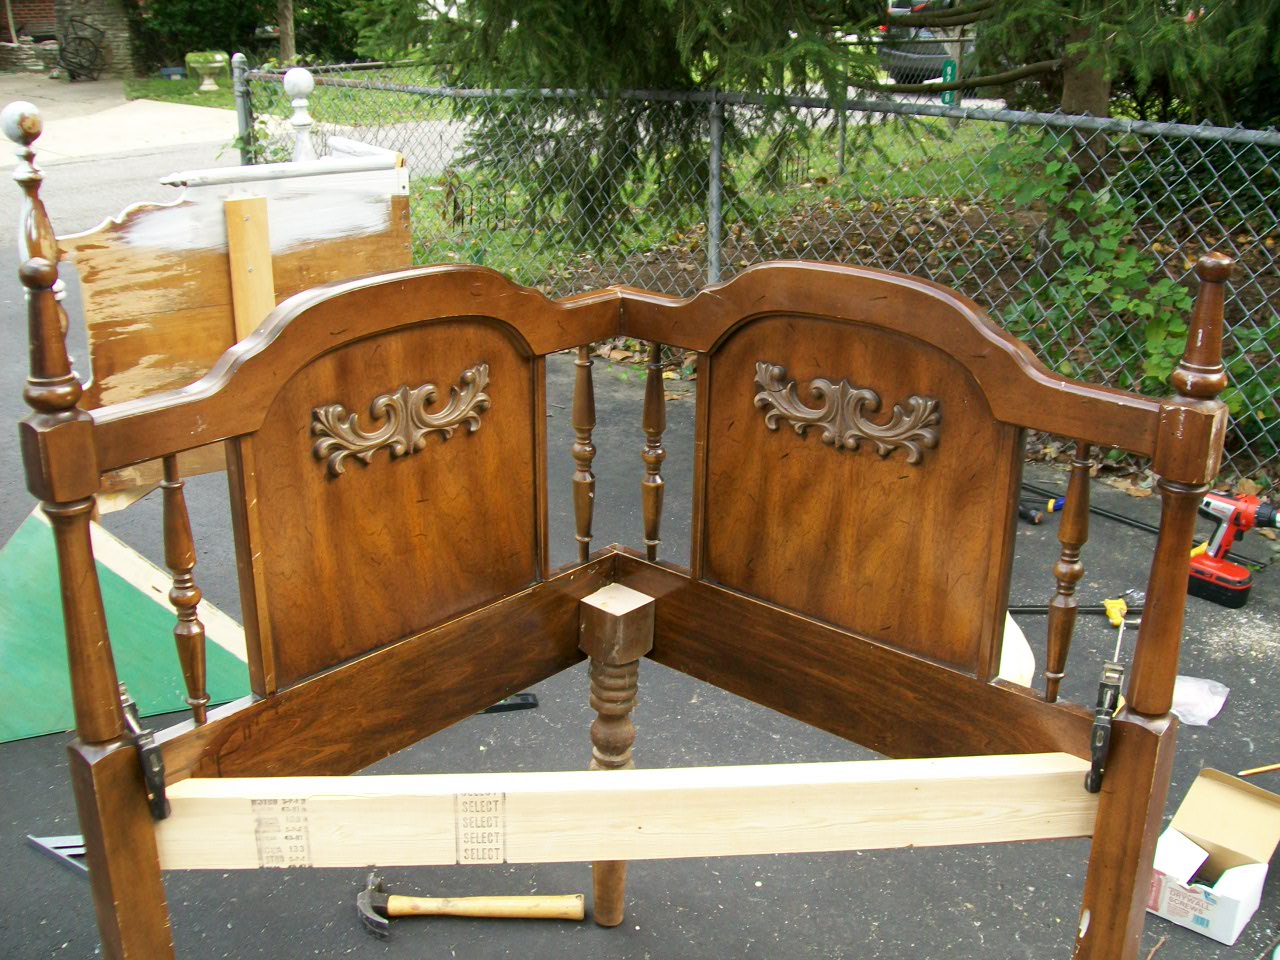
Constructing The Bench Frame
Constructing the bench frame is a crucial phase in building a headboard bench. It forms the base that supports the entire structure. A strong frame ensures safety and durability. Focus on precision and sturdy materials for best results.
Measuring And Cutting Wood
Start by measuring the length and height of the bench frame. Use a tape measure for accuracy. Mark the wood pieces clearly before cutting. Choose quality wood like pine or oak for strength. Cut the pieces using a saw, following your measurements carefully. Smooth rough edges with sandpaper to avoid splinters.
Assembling The Frame
Lay out all cut wood pieces on a flat surface. Join the pieces using wood screws or nails. Pre-drill holes to prevent wood from splitting. Use a carpenter’s square to keep corners at right angles. Clamp the frame to hold pieces steady while assembling. Double-check all connections for tightness and alignment.
Adding Support And Stability
Reinforce the frame by adding cross supports inside. Attach horizontal braces between legs to prevent wobbling. Use corner brackets for extra strength at joints. Test the frame by applying pressure to ensure it holds firm. Adjust or add supports if you notice any weak spots.
Finishing Touches And Upholstery
Finishing touches and upholstery bring your headboard bench to life. These final steps transform a simple frame into a cozy, stylish piece that fits your space perfectly. Paying attention to details like sanding, painting, and adding cushions can make a huge difference in comfort and appearance.
Sanding And Painting
Sanding smooths out rough edges and prepares the wood for paint or stain. Use medium-grit sandpaper first, then finish with fine-grit for a sleek surface. Don’t rush this step—uneven surfaces can ruin the final look.
Choose a paint or stain color that matches your room’s style. Matte finishes give a modern feel, while glossy paints add shine and durability. Applying two thin coats is better than one thick coat to avoid drips and uneven coverage.
Attaching The Headboard
Secure the headboard firmly to the bench frame for stability. Use screws that are long enough to hold but not too long to damage the wood. Pre-drill holes to prevent splitting, and double-check alignment before tightening.
Think about how the headboard will meet the wall. Adding rubber bumpers or felt pads can protect your walls from scratches. Does your space require the headboard to be removable? Consider using brackets or bolts for easy disassembly.
Adding Cushions And Fabric
Choose upholstery fabric that feels good to the touch and suits your decor. Durable fabrics like cotton blends or microfiber work well for daily use. Before attaching, lay out the fabric and cushions to ensure the size fits perfectly.
Attach cushions using Velcro strips, buttons, or tufting for a secure yet removable option. This lets you wash or replace cushions without hassle. Adding piping or decorative trim around edges gives a polished, professional look.
Credit: www.myrepurposedlife.com

Credit: 100things2do.ca
Frequently Asked Questions
What Materials Are Needed To Build A Headboard Bench?
You need wood boards, screws, wood glue, foam, fabric, and paint or stain. Basic tools include a saw, drill, screwdriver, measuring tape, and clamps.
How Long Does It Take To Build A Headboard Bench?
Building a headboard bench typically takes 4 to 6 hours. Time varies based on skill level and design complexity.
Can I Customize The Size Of My Headboard Bench?
Yes, you can easily customize dimensions. Measure your space and adjust wood pieces to fit your needs perfectly.
What Type Of Wood Is Best For A Headboard Bench?
Pine, oak, or plywood are popular choices. They offer durability, workability, and a smooth finish for painting or staining.
Conclusion
Building a headboard bench adds style and function to any room. You can follow simple steps to create a sturdy, comfortable piece. Choose materials that fit your budget and taste. Take your time with measuring and assembling for best results.
Enjoy the satisfaction of a handmade bench that suits your space. This project brings a fresh look and extra seating. Give it a try and see how easy it can be!


