
Are you ready to create a stunning buffet cabinet that fits perfectly in your home? Building your own buffet cabinet might sound challenging, but with the right plans, it becomes a rewarding and manageable project.
Imagine having a beautiful piece of furniture that not only looks great but also stores your favorite dishes and adds charm to your space. In this guide, you’ll discover step-by-step plans designed just for you—clear, simple, and easy to follow.
Keep reading, and you’ll be one step closer to crafting a buffet cabinet you’ll be proud of.
Choosing Materials
Building a buffet cabinet starts with picking the right materials. Good choices help make a strong and beautiful cabinet.
Think about the wood and tools you will need. These affect how your project turns out and how long it lasts.
Wood Types And Quality
Choose wood that is strong and looks good. Hardwoods like oak and maple work well for buffet cabinets.
Softwoods like pine are easier to work with but may dent more easily. Check wood for cracks or knots.
- Oak: durable and has a nice grain
- Maple: smooth and strong
- Pine: affordable and easy to shape
- Cherry: rich color and ages well
- Check for dry, straight boards with few defects
Tools And Hardware Needed
You will need basic woodworking tools to cut and assemble the cabinet. Make sure you have the right hardware for doors and drawers.
Good tools and hardware make your work easier and improve the cabinet’s look and function.
- Measuring tape and pencil for accuracy
- Saw to cut wood pieces
- Drill and screws for assembly
- Sandpaper to smooth edges
- Hinges and knobs for doors and drawers
- Wood glue for strong joints

Credit: www.reddit.com
Designing The Cabinet
Building a buffet cabinet requires careful planning and design. This guide will help you create a cabinet that meets your needs.
In this section, we will cover the key steps in designing your buffet cabinet. Focus will be on measuring and sketching, and planning storage and shelves.
Measuring And Sketching
Start by measuring the space where the cabinet will be placed. Accurate measurements ensure the cabinet fits perfectly.
- Measure the height, width, and depth of the space.
- Note any obstacles like power outlets or vents.
- Consider the room’s style and color scheme.
Once you have the measurements, sketch your initial design. A sketch helps visualize the final product and makes adjustments easier.
Planning Storage And Shelves
Think about what you will store in the cabinet. Plan for enough shelves and compartments to hold everything neatly.
| Item Type | Suggested Storage |
| Dishes | Open shelves |
| Table linens | Drawers |
| Glasses | Glass-front cabinets |
| Cutlery | Small drawers |
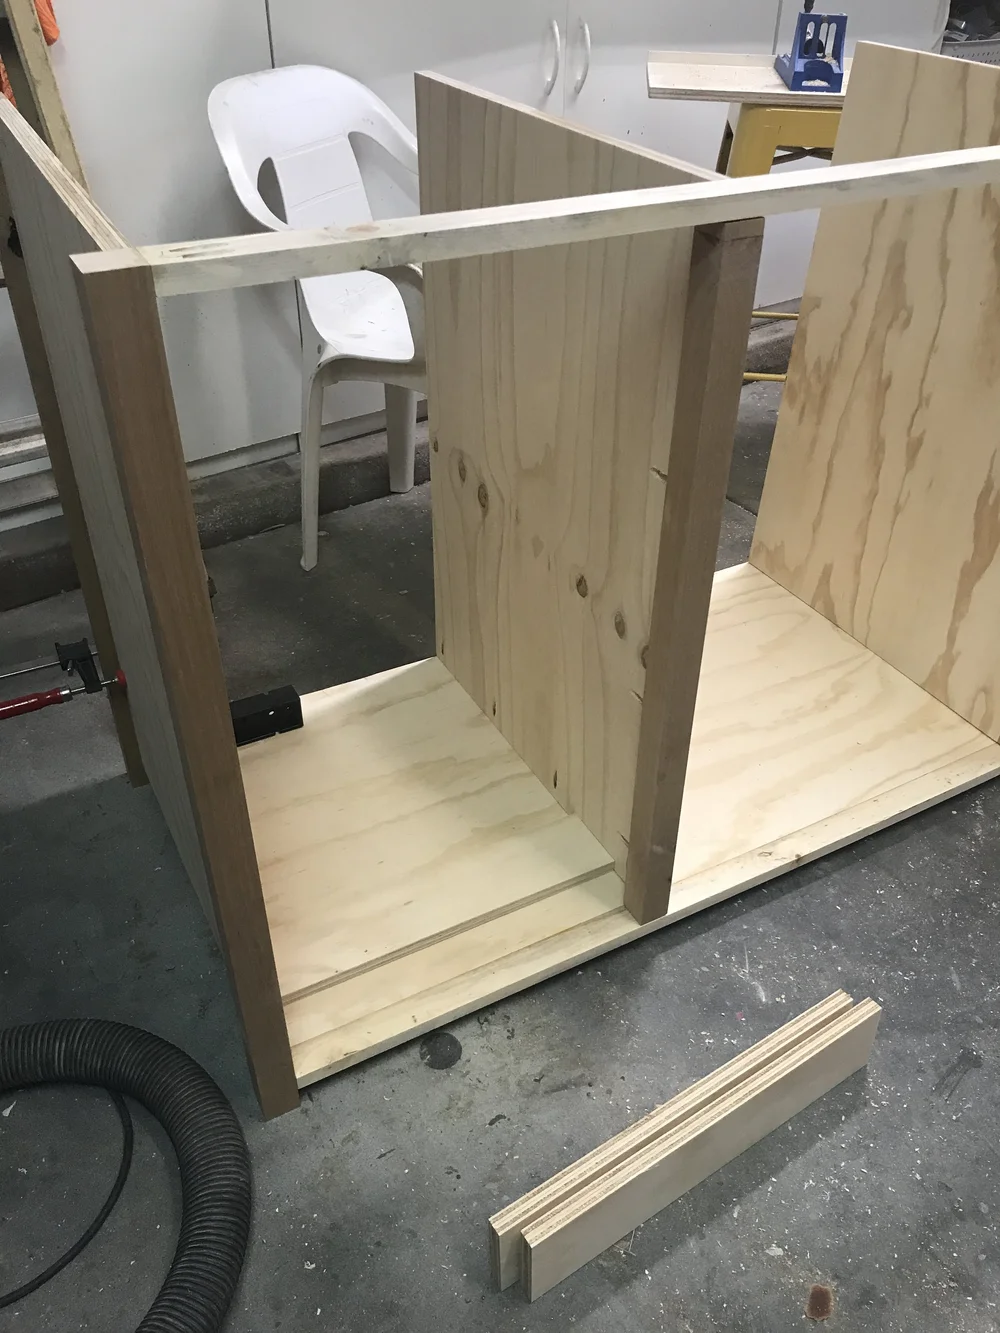
Step-by-step Assembly
Building a buffet cabinet requires careful preparation and assembly. Follow these steps to create a sturdy and beautiful piece.
This guide covers cutting and preparing pieces, then joining and securing parts correctly.
Cutting And Preparing Pieces
Start by measuring and cutting all wood pieces to size. Sand each piece to smooth the edges and surfaces.
- Measure carefully using a tape measure
- Cut pieces with a saw suitable for the wood type
- Sand edges and faces to prevent splinters
- Label each piece to avoid confusion during assembly
Joining And Securing Parts
Attach the parts by following the plan. Use screws and wood glue for strong joints.
| Step | Action | Tools Needed |
| 1 | Apply wood glue to joining edges | Wood glue, brush |
| 2 | Clamp pieces together tightly | Clamps |
| 3 | Pre-drill holes for screws | Drill, drill bit |
| 4 | Screw pieces securely | Screwdriver or drill |
| 5 | Check for square and adjust if needed | Carpenter’s square |
Credit: www.theawesomeorange.com
Finishing Touches
The finishing touches bring your buffet cabinet to life. They protect the wood and add style.
Take your time with these details to make your cabinet look great and last longer.
Sanding And Painting
Sanding smooths the wood surface. It removes rough spots and prepares the wood for paint.
Use fine-grit sandpaper for the best finish. Always sand in the direction of the wood grain.
- Start with medium-grit sandpaper (120 grit)
- Finish with fine-grit sandpaper (220 grit)
- Wipe off dust with a damp cloth before painting
- Apply primer if painting with light colors
- Use thin, even coats of paint or stain
- Let each coat dry fully before adding another
Installing Handles And Doors
Handles and doors complete the look of your cabinet. They add function and style.
Measure carefully and mark where to place the handles and hinges. Use a level for straight lines.
- Attach hinges to doors first
- Align doors on the cabinet frame
- Secure hinges with screws
- Mark handle positions on doors or drawers
- Drill holes for handles
- Fasten handles with screws
- Check doors open and close smoothly

Credit: www.create-enjoy.com
Frequently Asked Questions
What Materials Are Needed For Buffet Cabinet Plans?
Essential materials include plywood, hardwood, screws, wood glue, hinges, handles, and paint or stain. Quality materials ensure durability and aesthetic appeal.
How Long Does It Take To Build A Buffet Cabinet?
Building a buffet cabinet typically takes 10 to 15 hours, depending on skill level and complexity of the design.
Can Beginners Follow Buffet Cabinet Plans Easily?
Yes, many buffet cabinet plans are designed for beginners with step-by-step instructions and clear diagrams to simplify the process.
What Tools Are Required To Build A Buffet Cabinet?
Common tools include a saw, drill, screwdriver, measuring tape, sander, clamps, and a level to ensure precision.
Conclusion
Building a buffet cabinet can be a fun and rewarding project. Follow the steps carefully to create a sturdy and stylish piece. Choose the right materials and tools for the best results. Take your time with measurements and assembly to avoid mistakes.
A well-made buffet cabinet adds beauty and storage to your home. Enjoy the process and the satisfaction of making furniture yourself. Keep practicing, and your skills will grow with each project.


