Are you looking for a smart way to add extra seating and storage to your home? Building a bench seat with storage is a perfect solution that saves space and keeps your room organized.
Imagine having a cozy spot to sit while hiding away clutter neatly. In this guide, you’ll discover step-by-step instructions inspired by popular YouTube tutorials, making the whole process simple and fun. Keep reading, and you’ll soon have a stylish, practical bench that fits your space and lifestyle perfectly.

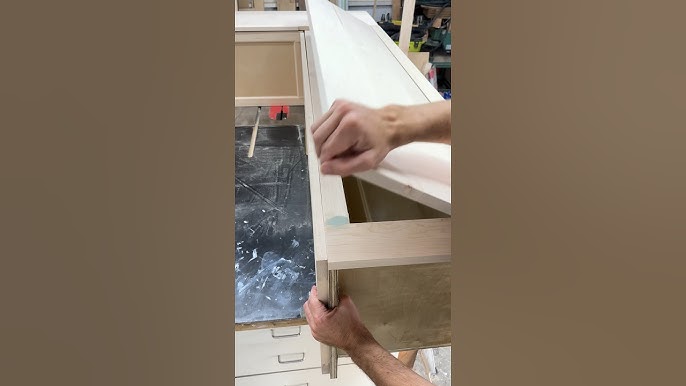
Credit: www.youtube.com
Materials And Tools Needed
Building a bench seat with storage requires some specific materials and tools. Getting everything ready helps the project go smoothly.
This guide covers what you need to make a sturdy and useful bench seat with extra storage space.
Wood And Building Materials
You will need good quality wood to build the bench frame and storage box. Choose wood that is strong and smooth.
- Plywood sheets (3/4 inch thick) for the seat and storage box
- 2×4 lumber for the bench frame
- Wood screws (1 1/4 inch and 2 1/2 inch)
- Wood glue for extra strength
- Sandpaper (120 and 220 grit) for smoothing surfaces
- Wood filler to cover holes and gaps
- Paint or wood stain for finishing
- Hinges for the storage lid
Tools Required
You will need basic woodworking tools to cut, assemble, and finish the bench seat.
| Tool | Purpose |
| Measuring tape | Measure wood pieces accurately |
| Circular saw or miter saw | Cut wood to size |
| Drill with screwdriver bits | Drive screws and drill holes |
| Clamps | Hold pieces together while glue dries |
| Hammer | Tap pieces into place if needed |
| Paintbrush or foam brush | Apply paint or stain |
| Safety gear | Protect eyes and ears while working |
Additional Supplies
Other items help make the bench seat look good and last long.
- Wood primer for better paint adhesion
- Soft-close hinges for quiet lid operation (optional)
- Rubber pads for bench feet to protect floors

Credit: www.youtube.com
Cutting And Preparing Wood
Building a bench seat with storage involves cutting and preparing wood. This step is crucial for a sturdy and functional bench.
Proper preparation ensures the wood pieces fit perfectly together. It also ensures the bench is safe and durable.
Selecting The Right Wood
Selecting the right wood type is important. Consider the bench’s location and the wood’s durability.
- Pine is affordable and easy to work with
- Cedar is resistant to decay, great for outdoor use
- Oak is strong and has a beautiful grain
Measuring And Marking
Before cutting, measure and mark the wood carefully. Accurate measurements prevent mistakes and waste.
- Use a tape measure for precise lengths
- Mark lines with a pencil for easy visibility
- Double-check measurements before cutting
Cutting The Wood
Cutting wood requires attention and the right tools. A saw is essential for this task.
- Use a hand saw for straight cuts
- A jigsaw is good for curved cuts
- Wear safety goggles to protect your eyes
Sanding The Edges
After cutting, sand the edges to smooth them. This prevents splinters and makes assembly easier.
- Use sandpaper or a sanding block
- Start with coarse grit, finish with fine grit
- Ensure all edges are smooth to the touch
Assembling The Bench Frame
Building a bench seat with storage starts with a strong frame. The frame holds the seat and storage together. It must be sturdy and well aligned.
This guide explains how to put the pieces together. Follow each step carefully for best results.
Gathering Materials And Tools
Before starting, collect all necessary materials and tools. This saves time and prevents interruptions.
- Wood boards cut to size
- Screws and nails
- Wood glue
- Drill or screwdriver
- Measuring tape
- Square tool
- Clamps
Laying Out The Frame Parts
Arrange the wood pieces on a flat surface. Lay them in the shape of the bench frame. Check that each piece fits well.
| Part | Dimensions | Function |
|---|---|---|
| Side Panels | 18″ x 36″ | Supports bench sides |
| Front and Back Rails | 12″ x 36″ | Connects side panels |
| Seat Supports | 2″ x 36″ | Holds seat board |
Joining The Frame Pieces
Use screws and wood glue to join the parts. Start by attaching the front and back rails to one side panel.
- Apply glue to the edges where the pieces meet.
- Clamp the pieces to keep them in place.
- Drive screws through the rails into the side panel.
- Attach the other side panel to complete the rectangle.
- Fix the seat supports inside the frame evenly spaced.
Checking For Squareness And Stability
Make sure the frame is square by measuring the diagonals. They should be equal. Tighten screws if needed.
Test the frame’s strength by pressing on different areas. It should not wobble or flex.

Credit: www.youtube.com
Finishing Touches And Storage Setup
After building the bench seat, focus on the finishing touches to ensure it looks great and lasts long. Properly setting up storage inside the bench helps keep your space neat and organized.
This guide covers how to finish the bench and arrange the storage area effectively.
Applying Paint Or Stain
Choose a paint or stain that matches your room decor. Sand the bench seat lightly before applying for a smooth finish. Use even strokes to avoid streaks and let each coat dry completely.
- Clean the surface before painting
- Apply primer if needed
- Use a brush or roller for smooth coverage
- Apply two coats for durability
- Seal with a clear finish for protection
Installing Hardware
Attach handles, hinges, or knobs to access the storage compartment easily. Measure and mark the spots before drilling to ensure correct placement. Tighten screws firmly but avoid over-tightening.
Organizing The Storage Space
Plan how to use the storage area efficiently. Use dividers or boxes to separate items and keep things tidy. Label containers for easy access.
| Storage Item | Suggestion |
| Blankets | Fold neatly in fabric bins |
| Books | Stack vertically with bookends |
| Seasonal Decor | Store in labeled plastic containers |
| Cleaning Supplies | Place in a small caddy |
Final Inspection And Maintenance Tips
Check the bench for any loose parts or rough edges. Tighten screws and sand any rough spots for safety. Clean the bench regularly to keep it looking fresh.
- Inspect hardware every few months
- Touch up paint or stain as needed
- Keep the storage area dry and clean
- Use soft cloths for cleaning
Frequently Asked Questions
How Do I Start Building A Bench Seat With Storage?
Begin by measuring your space and planning dimensions. Gather materials like wood, screws, and hinges. Follow a step-by-step video guide for precise cuts and assembly. Proper planning ensures a sturdy and functional bench seat with ample storage.
What Tools Are Needed For Bench Seat Construction?
Essential tools include a saw, drill, screwdriver, measuring tape, and clamps. Sandpaper and a level also help ensure smooth finishes and accurate assembly. These tools make the building process easier and more precise.
How Can I Maximize Storage In A Bench Seat?
Use deep compartments or drawers under the seat. Incorporate dividers to organize items efficiently. Choose a hinged top for easy access. Smart design optimizes space while keeping the bench functional and stylish.
Which Wood Type Is Best For A Storage Bench?
Pine, oak, and plywood are popular choices. Pine is affordable and easy to work with. Oak offers durability and a classic look. Plywood is budget-friendly and strong for structural parts.
Conclusion
Building a bench seat with storage is a useful project anyone can try. It saves space and adds style to your room. The video shows each step clearly and simply. You can choose your materials and colors to match your home.
Take your time and follow the instructions carefully. Enjoy your new bench seat that holds things neatly inside. This project brings both comfort and order to your living space. Give it a go and see how easy and rewarding it can be.


