
Are you ready to give your vanity a fresh, polished look? Attaching the table top correctly is the key to a sturdy and beautiful finish.
Whether you’re upgrading an old piece or building one from scratch, knowing how to secure the table top will save you time and frustration. In this guide, you’ll discover simple steps and insider tips that make the process easy—even if you’re not a DIY expert.
Keep reading, and you’ll soon feel confident turning your vanity into a stunning focal point in your space.
Credit: bfymirror.com
Tools And Materials Needed
Attaching the table top of a vanity requires the right tools and materials. Using proper items makes the job easier and safer.
This guide lists the essential tools and materials you need to securely attach your vanity table top.
Screwdriver Or Drill
A screwdriver or drill is needed to fasten screws that hold the table top in place. Choose the right size and type of screwdriver bit.
- Electric drill for faster work
- Phillips or flathead screwdriver
- Screwdriver bits matching screw heads
Screws
Screws secure the table top to the vanity base. Pick screws that are strong and the right length.
- Wood screws for wooden vanities
- Length around 1 to 1.5 inches
- Choose rust-resistant screws for bathrooms
Measuring Tape
Measuring tape helps you check dimensions and placement before attaching. Accurate measurements prevent mistakes.
- Use tape with clear markings
- Measure both width and depth
- Double-check measurements for accuracy
Level
A level ensures the table top is perfectly horizontal. This helps avoid an uneven surface.
- Use a small spirit or bubble level
- Check level at several points
- Adjust placement if needed
Clamps (optional)
Clamps hold the table top steady during attachment. They make the process easier, especially if working alone.
- Use adjustable clamps for tight grip
- Protect table surface with soft pads
- Check clamps are secure before screwing
Wood Glue (optional)
Wood glue adds extra strength to the joint between the table top and base. Use it with screws for a firm hold.
- Apply glue evenly on contact surfaces
- Allow glue to dry fully before use
- Choose waterproof glue for bathrooms

Credit: acedecorbath.com
Preparing The Vanity Base
Before attaching the table top to your vanity, ensure the base is ready. This step is crucial for stability and durability.
Proper preparation of the vanity base ensures a smooth installation process. Follow these steps to set up your vanity base.
Check The Level Of The Vanity
Use a spirit level to check if the vanity is even. An uneven base can cause the table top to sit incorrectly.
- Place the level on the vanity surface.
- Adjust the legs until the bubble is centered.
- Recheck the level after adjustments.
Secure The Vanity To The Wall
Attaching the vanity to the wall prevents it from moving. This adds safety and stability to your setup.
Use wall anchors and screws suitable for your wall type. Drill carefully to avoid damaging the wall.
Install Support Brackets
Support brackets provide additional strength to hold the table top. Install them inside the vanity structure.
- Measure the distance for bracket placement.
- Use a drill to secure the brackets firmly.
- Ensure brackets are level and aligned.
Check For Obstructions
Make sure there are no obstructions inside the vanity. This includes plumbing or electrical components.
| Obstruction | Solution |
| Pipes | Reroute if possible |
| Wiring | Secure with clips |
| Cabinet Hinges | Adjust or remove |
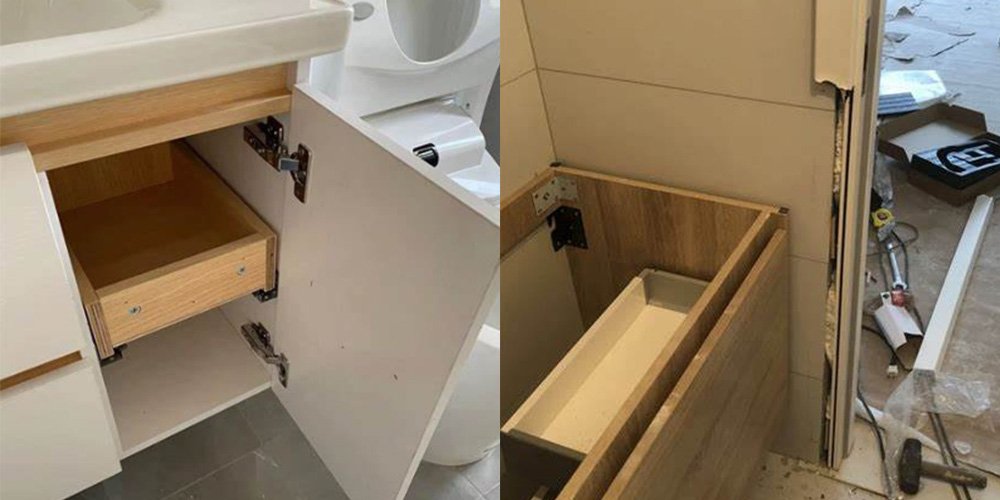
Aligning The Table Top
Attaching the table top of a vanity requires careful alignment. Proper alignment ensures stability and a neat appearance.
This guide covers key steps to help you align the table top correctly and securely.
Before placing the table top, check that the vanity base is level. Use a spirit level to confirm flatness. Adjust the feet or supports if needed.
Positioning The Table Top
Place the table top gently on the vanity base. Center it so edges match evenly on all sides. Avoid letting it overhang too much.
Use screws or brackets to fix the table top to the base. Check the manufacturer’s instructions for the best fasteners to use.
- Mark the screw positions under the table top.
- Drill pilot holes carefully.
- Attach screws without overtightening.
- Check alignment before final tightening.
Checking The Final Alignment
After securing, check the table top edges again. Use a ruler or straightedge to verify even spacing around all sides.
| Check Point | What to Look For |
|---|---|
| Front Edge | Even with vanity front, no gaps |
| Side Edges | Flush with sides, no overhang |
| Back Edge | Aligned with back of vanity base |
| Level Surface | Flat, no tilting or rocking |

Credit: acedecorbath.com
Securing The Table Top
Attaching the table top of a vanity needs care. A well-secured top ensures stability and safety.
This guide explains how to fix the table top firmly to your vanity base.
Prepare The Vanity Base
First, check that the vanity base is level and clean. Remove dust and debris from the surface.
Use The Right Fasteners
Select screws or brackets designed for furniture assembly. These fasteners hold the table top securely in place.
- Wood screws are common for wooden vanities
- Metal brackets add extra support
- Use screws of proper length to avoid damage
Apply Adhesive For Extra Hold
Use a strong wood glue or construction adhesive on the vanity top edges. This keeps the top from shifting.
Attach The Table Top
Place the table top carefully on the base. Align it so edges match the vanity frame exactly.
| Action | Details |
| Clamp the Table Top | Hold the top firmly in place during attachment |
| Drive Screws | Insert screws through brackets into the top |
| Check Alignment | Ensure the top is even and secure |
Final Checks
After attachment, check for any movement or gaps. Tighten screws if needed.
Frequently Asked Questions
How Do I Secure A Vanity Tabletop Properly?
To secure a vanity tabletop, use mounting brackets or adhesive designed for countertops. Align the tabletop, then fasten it with screws through the brackets. Ensure the surface is clean and dry before attachment for a strong hold.
What Tools Are Needed To Attach A Vanity Tabletop?
You will need a drill, screwdriver, measuring tape, level, mounting brackets, and adhesive. These tools help position and secure the tabletop safely and accurately. Having all tools ready makes the installation process smooth and efficient.
Can I Attach A Vanity Tabletop Without Brackets?
Yes, strong adhesive can be used to attach the tabletop without brackets. Clean surfaces thoroughly, apply adhesive evenly, and press firmly. However, brackets provide extra stability, especially for heavier tabletops or frequent use.
How To Align The Vanity Tabletop Correctly?
Measure the vanity base and tabletop dimensions before placement. Use a level to ensure the tabletop is even. Align edges carefully, then secure with brackets or adhesive. Proper alignment prevents damage and improves the vanity’s appearance.
Conclusion
Attaching a vanity table top is easier than you think. Follow the steps carefully and take your time. Use the right tools and secure the top firmly. Check that everything fits and feels steady. A well-attached table top improves both look and function.
Enjoy your upgraded vanity space with confidence. Simple work, great results.


