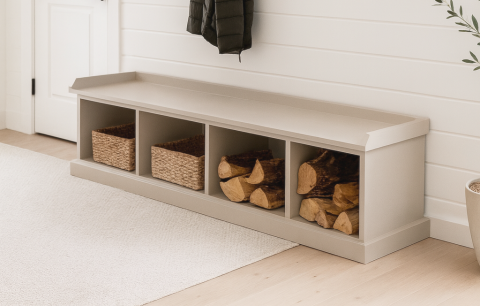
Are you tired of clutter taking over your space? Imagine having a beautiful wooden storage bench that not only keeps your belongings organized but also adds charm to your room.
Building one yourself might sound tricky, but it’s easier than you think. In this guide, you’ll discover simple steps to create a sturdy, stylish storage bench that fits your needs perfectly. Ready to transform your space and enjoy the satisfaction of DIY?
Let’s get started!

Credit: www.youtube.com
Choosing The Right Wood
Building a wooden storage bench starts with picking the right wood. The wood affects how strong and good the bench looks.
Different woods offer different benefits. Some woods last longer. Others have beautiful finishes.
Types Of Wood For Durability
Durable wood keeps your bench strong for years. Choose wood that resists rot and damage.
- Teak: Very strong and water-resistant.
- Cedar: Resists insects and decay.
- Oak: Hard wood that lasts long.
- Redwood: Naturally durable and weather-proof.
- Mahogany: Hard and resistant to wear.
Selecting Wood For Style And Finish
Wood style changes the look of your bench. The wood grain and color add character.
| Wood Type | Color | Grain Pattern | Finish Options |
|---|---|---|---|
| Maple | Light cream | Fine, smooth | Stains well, smooth finish |
| Cherry | Reddish brown | Fine, straight | Darkens with age, rich finish |
| Walnut | Dark brown | Coarse, straight | Polishes to a deep shine |
| Pine | Yellowish white | Knots and streaks | Easy to paint or stain |

Credit: m.youtube.com
Gathering Tools And Materials
Building a wooden storage bench is a rewarding project. It requires gathering the right tools and materials to ensure success.
Let’s explore the essential tools and materials needed for this woodworking task.
Essential Tools For Woodworking
To create a sturdy wooden storage bench, having the right tools is crucial. These tools will help you cut, measure, and assemble the wood efficiently.
- Measuring Tape: Accurate measurements are key to a perfect fit.
- Saw: A handsaw or circular saw will help you cut the wood to size.
- Drill: Essential for making holes and driving screws.
- Screwdriver: Manual or powered, for tightening screws.
- Sanding Block: Smooths rough edges for a polished look.
Materials Checklist
Having the right materials is as important as having the right tools. Ensure you have everything before starting your project.
| Material | Quantity |
| Wood Planks | 5 pieces |
| Wood Screws | 1 box |
| Wood Glue | 1 bottle |
| Hinges | 2 sets |
| Varnish | 1 can |
Step-by-step Construction
Building a wooden storage bench is a great project for beginners. It combines seating with storage space.
This guide will show you how to make a sturdy bench step by step. Follow each part carefully.
Measuring And Cutting Wood Pieces
Start by measuring all the wood pieces you will need. Accurate measurements help the bench fit together well.
Use a saw to cut the wood according to your measurements. Take your time to make straight cuts.
- Measure the length, width, and height of the bench parts
- Mark the wood clearly before cutting
- Cut the seat, sides, back, and bottom pieces
- Sand the edges smooth after cutting
Assembling The Frame And Seat
Next, join the frame pieces to create the bench structure. Use screws or nails to hold the parts firmly.
Attach the seat on top of the frame. Make sure it fits tightly and is level for safe sitting.
- Assemble the base frame first using the side and bottom pieces
- Secure the back panel to the frame
- Place the seat piece on top and fix it in place
- Check all joints for stability
Adding Hinges And Storage Features
Install hinges to connect the seat to the frame. This lets you lift the seat to access storage inside.
Add handles or knobs to make lifting easier. You can also add a latch to keep the seat closed.
- Attach two sturdy hinges on the back edge of the seat
- Install handles on the front side of the seat
- Optionally, add a latch or magnetic catch to secure the seat
- Test the seat movement for smooth opening and closing
Finishing Touches
Finishing your wooden storage bench improves its look and durability. Proper finishing protects the wood from damage and wear. This section covers sanding, painting or staining, and sealing the bench.
Each step makes the bench more comfortable and long-lasting. Take your time with these details for the best results.
Sanding And Smoothing Surfaces
Start by sanding all wooden surfaces to remove rough spots and splinters. Use fine-grit sandpaper for a smooth finish. Sand along the wood grain to avoid scratches.
- Wear a dust mask to protect your lungs
- Sand edges and corners carefully
- Wipe off dust with a damp cloth after sanding
- Repeat sanding if needed for smoother feel
Applying Paint Or Stain
Choose paint or stain to change the color and style of your bench. Paint offers a solid color while stain shows the wood grain. Apply with a brush or cloth evenly.
| Type | Effect | Drying Time |
| Paint | Opaque, covers grain | 4–6 hours |
| Stain | Transparent, highlights grain | 2–4 hours |
| Gel Stain | Thicker, good for vertical surfaces | 2–3 hours |
Sealing For Protection
Seal the bench to protect it from moisture and dirt. Use clear polyurethane or varnish. Apply thin coats and let each dry before adding the next.
- Choose satin or gloss finish for look
- Apply with a clean brush in smooth strokes
- Lightly sand between coats for smoothness
- Allow full curing time before use

Credit: crystelmontenegrohome.com
Frequently Asked Questions
What Materials Do I Need To Build A Wooden Storage Bench?
You need wood boards, screws, wood glue, sandpaper, hinges, and a finish like paint or stain. Choose durable wood such as pine or oak for strength and longevity.
How Do I Design A Wooden Storage Bench?
Start by measuring your space and deciding bench dimensions. Sketch a simple plan with a seat, storage compartment, and lid. Ensure sturdy support and comfortable height.
What Tools Are Essential For Building A Storage Bench?
Basic tools include a saw, drill, screwdriver, measuring tape, and clamps. These tools help cut, assemble, and secure the wood parts efficiently.
How Do I Assemble The Wooden Storage Bench?
Cut wood pieces as per plan. Attach the frame first using screws and glue. Add the seat and attach the lid with hinges. Sand all surfaces smooth before finishing.
Conclusion
Building a wooden storage bench is a rewarding project anyone can try. You only need basic tools, wood, and some patience. Follow the steps carefully and take your time. The bench adds both style and function to your space. It offers a place to sit and store things neatly.
Enjoy the satisfaction of making something useful with your own hands. Keep practicing to improve your skills for future projects. Simple, practical, and fun to create.


